Category: Coding & Development

Tutorials, tips, and resources for developers and programmers at every skill level.

  • Edge Computing vs Cloud Computing: Key Differences and Use Cases

    Edge Computing vs Cloud Computing: Key Differences and Use Cases

    Two Powerful Paradigms Reshaping How We Process Data in 2026

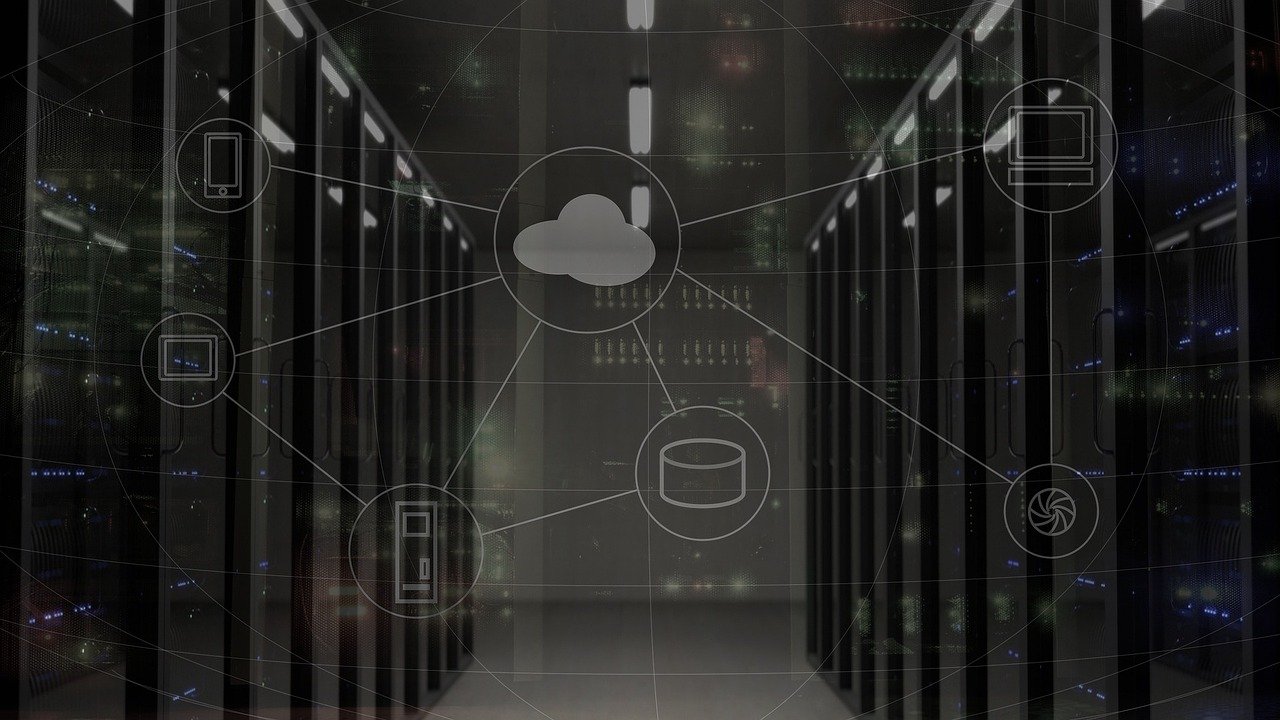
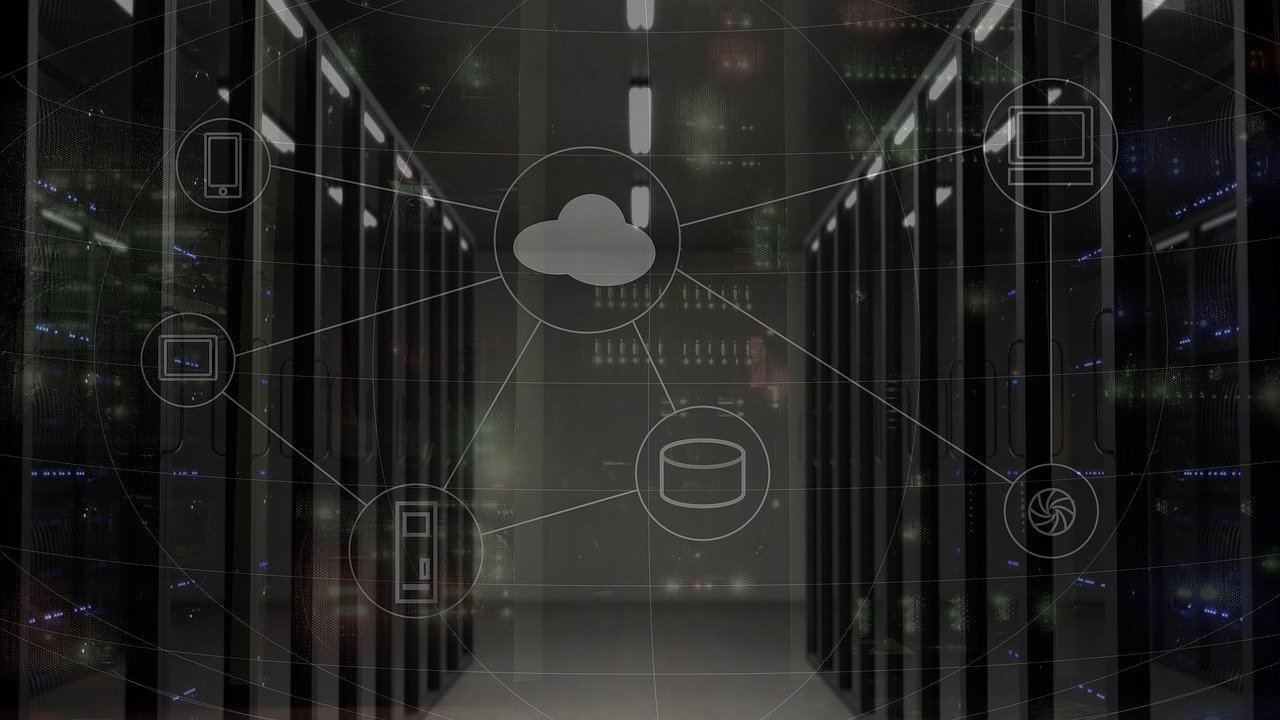
    Edge computing and cloud computing are no longer competing technologies — they’re complementary forces that, when understood correctly, can transform how businesses handle data, latency, and cost at scale. By 2026, the global edge computing market has surpassed $87 billion, while cloud computing continues its dominance above $900 billion in annual spend. Yet most businesses still struggle to know which approach fits their specific needs — or when to use both. This guide cuts through the confusion.

    Whether you’re a startup founder, IT decision-maker, or developer trying to architect a smarter system, understanding the real differences between edge computing vs cloud computing is one of the most valuable technical decisions you’ll make this decade. Let’s break it down clearly, practically, and without the jargon overload.

    What These Technologies Actually Do — In Plain Terms

    Cloud Computing: Centralised Power at Massive Scale

    Cloud computing moves your data and processing to large, centralised data centres operated by providers like AWS, Microsoft Azure, and Google Cloud. When your app stores a file, runs an algorithm, or trains a machine learning model, it typically sends that data across the internet to one of these remote servers — processes it — and returns the result.

    The beauty of this model is scale and simplicity. You don’t own hardware. You don’t maintain servers. You pay for what you use. Cloud platforms offer hundreds of managed services, from databases to AI inference engines, that would take years and millions of dollars to build yourself. For most businesses in the early 2020s, the cloud was the obvious answer to almost every computing challenge.

    Edge Computing: Processing Where the Data Lives

    Edge computing flips that model. Instead of sending raw data to a distant data centre, computation happens at or near the source — on a device, a local gateway, a factory floor server, or a telecommunications base station. The “edge” refers to the outer boundary of a network, closest to where data is generated.

    Think of a smart security camera that can identify a threat in milliseconds without needing to ping a server in Virginia. Or an autonomous vehicle making split-second braking decisions using onboard processors rather than waiting for a cloud response. This local processing reduces latency, cuts bandwidth costs, and keeps sensitive data out of centralised systems.

    By 2026, IDC estimates that over 45% of all enterprise data is being processed at the edge rather than in centralised cloud environments — a dramatic shift from just 10% in 2019.

    The Core Technical Differences That Actually Matter

    Latency and Response Time

    This is where edge computing has its most decisive advantage. Cloud computing typically introduces 50 to 150 milliseconds of round-trip latency, depending on geographic proximity to data centre regions. For most web applications, email, or content streaming, that’s imperceptible. But for real-time systems — surgical robots, industrial automation, AR/VR environments, or financial high-frequency trading — even 20 milliseconds can mean the difference between success and failure.

    Edge computing reduces response time to single-digit milliseconds by eliminating the need to traverse the internet. Local processing means local speed. This is not a marginal improvement — it’s a fundamental capability shift that enables entirely new categories of applications.

    Bandwidth and Data Transfer Costs

    Cloud computing works beautifully when data volumes are manageable. But consider a modern manufacturing plant running 500 IoT sensors generating continuous data streams. Sending all of that raw telemetry to the cloud 24/7 would consume enormous bandwidth and generate significant egress costs. Cloud providers charge for data leaving their networks, and those fees add up fast at enterprise scale.

    Edge computing solves this by processing and filtering data locally. Only summarised insights, anomalies, or relevant outputs get sent to the cloud — reducing bandwidth consumption by up to 80% in many industrial deployments. The edge handles the heavy lifting locally; the cloud handles storage, analytics, and long-term trend analysis.

    Security and Data Sovereignty

    Both models have security strengths and weaknesses. Cloud providers invest billions in security infrastructure, compliance certifications, and threat detection. For most small and medium businesses, the cloud is objectively more secure than any on-premises setup they could build themselves.

    However, edge computing offers a different kind of security advantage: data minimisation. When sensitive patient health data, financial transactions, or private communications never leave a local device or facility, the attack surface for external breaches shrinks significantly. This is especially important for businesses operating under GDPR in the UK and EU, HIPAA in the United States, or the Privacy Act in Australia, where data residency and localisation requirements are increasingly strict in 2026.

    Reliability and Offline Capability

    Cloud computing has a fundamental dependency: internet connectivity. If your connection drops, cloud-dependent applications either slow dramatically or stop functioning entirely. For businesses in remote locations, on ships, in aircraft, or in areas with unreliable connectivity, this is a serious operational risk.

    Edge systems can operate fully offline. A retail point-of-sale system built on edge architecture continues processing transactions during an outage and syncs with the cloud when connectivity returns. A wind turbine on a remote hillside keeps optimising its blade angle without needing to call home first. This resilience is a genuine operational advantage that cloud-only architectures simply cannot match.

    Real-World Use Cases: Where Each Approach Wins

    When Cloud Computing Is the Right Choice

    • Big data analytics and machine learning training: Training large AI models requires GPU clusters, vast storage, and specialised software — all available on demand via cloud providers. Running these workloads locally would require millions in hardware investment.
    • Collaborative SaaS applications: Tools like project management platforms, CRM systems, and document editors need centralised data so teams across countries can collaborate in real time.
    • Startup and variable workloads: Businesses with unpredictable traffic spikes benefit massively from cloud elasticity. Scaling from 10 to 10,000 users without provisioning hardware is a genuine superpower.
    • Disaster recovery and backup: Geo-redundant cloud storage remains one of the most cost-effective and reliable approaches to data backup available to businesses of any size.
    • Global content delivery: Streaming platforms, e-commerce sites, and media companies use cloud infrastructure with CDN layers to serve users worldwide with consistent performance.

    When Edge Computing Is the Right Choice

    • Industrial IoT and smart manufacturing: Factories use edge systems to monitor equipment in real time, predict failures before they occur, and control machinery with precision — all without relying on internet connectivity.
    • Autonomous vehicles and drones: Real-time perception, decision-making, and control loops cannot tolerate cloud latency. Onboard edge processors handle navigation while the cloud manages mapping updates and fleet analytics.
    • Healthcare at the point of care: Wearables and bedside monitoring devices process vital signs locally, alerting clinicians instantly without sending raw patient data across external networks.
    • Retail and smart environments: In-store computer vision for inventory management, cashierless checkout, and personalised displays processes video streams locally — reducing bandwidth and protecting customer privacy.
    • Telecommunications and 5G: Mobile network operators deploy edge computing directly within 5G infrastructure, enabling ultra-low-latency services for enterprise customers — a massive growth area throughout 2025 and 2026.

    The Hybrid Edge-Cloud Architecture: The 2026 Reality

    Here’s the practical truth that most technology articles miss: very few modern deployments are purely one or the other. The most resilient, cost-efficient, and capable architectures in 2026 use edge and cloud together in a deliberate, tiered design.

    Data is captured and acted upon at the edge. Aggregated insights are sent to the cloud for storage, long-term analytics, and AI model training. Updated models are then pushed back to the edge for local inference. This cycle — often called the edge-cloud continuum — is the architecture pattern powering smart cities, connected healthcare systems, and Industry 4.0 manufacturing deployments globally.

    According to Gartner’s 2025 infrastructure report, 70% of enterprises deploying edge solutions also maintain significant cloud workloads, confirming that hybrid is the dominant architectural strategy heading into the second half of the decade.

    Cost Considerations: Breaking Down the Economics

    Cloud Costs: Flexible but Potentially Unpredictable

    Cloud computing operates on an operational expenditure model — you pay as you go. This is ideal for early-stage businesses, seasonal workloads, and unpredictable growth. However, at scale, cloud costs can surprise organisations. Data egress fees, storage tiers, compute costs for continuously running services, and licensing stacks for managed databases can push monthly bills far beyond initial projections.

    Cloud cost optimisation has become its own discipline in 2026, with dedicated FinOps teams in enterprise organisations working specifically to reduce cloud waste — estimated at $17.6 billion annually across North American enterprises according to Flexera’s 2025 State of the Cloud Report.

    Edge Costs: Higher Upfront, Lower at Scale

    Edge computing typically requires capital expenditure — hardware, installation, and local maintenance. An edge deployment for a manufacturing facility might require significant investment in ruggedised servers, edge gateways, and local networking infrastructure. For small deployments, this can feel prohibitive compared to cloud’s zero-hardware model.

    However, at scale and over time, edge economics often favour the approach. Reduced bandwidth costs, lower egress fees, elimination of latency-related business costs, and reduced cloud compute spend can produce strong ROI over a three-to-five year horizon. Businesses processing high volumes of local data — video, sensor streams, telemetry — typically see the strongest financial case for edge investment.

    Practical Tips for Making the Right Decision

    1. Audit your latency requirements first. If any core function requires sub-20ms response times, edge is mandatory — not optional.
    2. Calculate your data volumes honestly. If you’re generating more than a few terabytes of raw data monthly that needs processing, model the egress and compute costs carefully before defaulting to cloud-only.
    3. Assess your connectivity reliability. Operations in remote, mobile, or connectivity-challenged environments need edge resilience by design.
    4. Map your compliance obligations. Data residency laws in your operating regions may make edge processing not just preferable, but legally required for certain data types.
    5. Don’t force a binary choice. Design your architecture to use both: edge for real-time action, cloud for intelligence and scale.

    What’s Coming Next: Edge and Cloud Trends Shaping 2026 and Beyond

    The boundary between edge and cloud is becoming increasingly fluid. Serverless edge functions — where code executes at edge nodes as close to the user as possible — are making it easier for developers to deploy latency-sensitive logic without managing infrastructure. Platforms like Cloudflare Workers, AWS Lambda@Edge, and Fastly Compute are democratising edge deployment in ways that were only available to telcos and large enterprises just three years ago.

    AI is a major driver of edge growth. As large language models and computer vision systems move toward smaller, more efficient architectures optimised for on-device inference, the capability gap between edge and cloud AI is closing rapidly. In 2026, running a capable multimodal AI model on a smartphone or edge device — unthinkable in 2022 — is now commercially mainstream.

    5G network expansion across the United States, United Kingdom, Canada, Australia, and New Zealand is another accelerant. As 5G coverage matures, mobile edge computing (MEC) infrastructure embedded within carrier networks enables new enterprise use cases that combine 5G’s bandwidth with edge computing’s low latency — creating what analysts are calling the “tactile internet,” where real-time physical-digital interaction becomes seamlessly possible.

    Sustainability is also reshaping architecture decisions. Processing data locally at the edge reduces the energy required to transmit information across long-distance networks, and modern edge hardware is becoming significantly more energy-efficient. For organisations with net-zero commitments — increasingly mandated by regulators and investors in 2026 — edge-cloud hybrid architectures offer a path to both performance and reduced carbon footprint.

    Frequently Asked Questions

    Is edge computing replacing cloud computing?

    No — edge computing is not replacing cloud computing, and it’s unlikely to do so. The two technologies serve different purposes and work best together. Cloud computing excels at centralised storage, AI model training, global collaboration, and elastic scaling. Edge computing excels at real-time processing, local resilience, and bandwidth efficiency. Most modern enterprise architectures in 2026 use both in a hybrid design, with each layer handling the workloads it does best.

    Which is more secure — edge or cloud?

    Neither is universally more secure — it depends on the threat model. Cloud providers like AWS, Azure, and Google Cloud invest billions in physical and cyber security, making their platforms extremely robust against most threats. Edge computing reduces risk by keeping sensitive data local and minimising exposure to external networks, which is valuable for healthcare, financial, and government applications. Best practice in 2026 is to implement strong security at both layers: encrypt data at the edge, use zero-trust network architectures, and leverage cloud-native security tools for monitoring and response.

    What is the difference between edge computing and fog computing?

    Fog computing is essentially an extension of edge computing that introduces an intermediate processing layer between edge devices and the cloud. While edge computing processes data directly on or near the device generating it, fog computing uses local area network nodes — sometimes called fog nodes — to aggregate and process data from multiple edge devices before sending it to the cloud. In practice, the terms are often used interchangeably, and the broader edge computing category has largely absorbed fog computing as a sub-architecture in mainstream usage by 2026.

    How does 5G affect edge computing?

    5G and edge computing are deeply intertwined. 5G networks deliver the high bandwidth and low latency needed to make edge deployments practical at scale, particularly for mobile and IoT applications. Telecommunications providers are embedding edge computing infrastructure directly within 5G base stations through a technology called Multi-access Edge Computing (MEC). This allows enterprise applications to process data within the carrier’s network — milliseconds from the device — enabling use cases like real-time AR, autonomous vehicle coordination, and remote industrial control that simply weren’t possible on 4G infrastructure.

    Is edge computing suitable for small businesses?

    It depends on the use case. Most small businesses are well-served by cloud computing for standard workloads — email, file storage, CRM, e-commerce, and accounting. However, small businesses in specific industries may find edge computing valuable: a small medical practice needing local data processing for compliance, a retail store using computer vision for inventory, or a logistics company needing offline-capable mobile applications. The growing availability of low-cost, easy-to-deploy edge hardware and edge-capable SaaS platforms is making edge more accessible to smaller organisations than ever before in 2026.

    What industries benefit most from edge computing?

    The industries seeing the highest ROI from edge computing in 2026 include manufacturing and industrial automation, healthcare and remote patient monitoring, retail and smart store operations, telecommunications and 5G services, transportation and autonomous vehicles, energy and smart grid management, and agriculture through precision farming technologies. These sectors share common characteristics: high data volumes generated locally, real-time decision requirements, connectivity limitations, or strict data sovereignty regulations — all conditions where edge processing delivers meaningful advantages over pure cloud approaches.

    How do I get started with a hybrid edge-cloud architecture?

    Start with a clear workload inventory. Document every data source, processing requirement, latency need, and compliance obligation in your organisation. Categorise workloads as real-time action (edge candidate), analytical and storage (cloud candidate), or both. For most organisations, the practical starting point is to keep existing cloud workloads running and introduce edge processing for specific high-priority use cases — a single production line, one retail location, or one category of IoT device. Evaluate results, refine your architecture, and expand deliberately. Major cloud providers including AWS Outposts, Azure Stack Edge, and Google Distributed Cloud all offer managed hybrid platforms that make it easier to start without rebuilding your entire infrastructure.

    Understanding edge computing vs cloud computing is no longer just a technical question — it’s a strategic business decision that shapes cost structures, application capabilities, compliance posture, and competitive advantage. The organisations winning in 2026 are not those that chose edge over cloud, or cloud over edge, but those that thoughtfully deployed both in architectures matched to their actual needs. Start with your use cases, follow the data, and build the infrastructure that serves your outcomes — not the one that fits a convenient marketing narrative.

    Disclaimer: This article is for informational purposes only. Always verify technical information and consult relevant professionals for specific advice regarding your organisation’s infrastructure, compliance requirements, and technology architecture decisions.


  • GitOps Explained: Managing Infrastructure with Git Workflows

    GitOps Explained: Managing Infrastructure with Git Workflows

    Why Modern DevOps Teams Are Ditching Traditional Deployment Methods

    GitOps is transforming how engineering teams deploy and manage infrastructure, with adoption growing by over 40% among enterprise DevOps teams between 2024 and 2026. If you’ve ever dealt with configuration drift, mysterious server changes, or painful rollback scenarios, GitOps offers a principled solution that uses Git as the single source of truth for both application code and infrastructure state. This guide breaks down everything you need to know — from core concepts to real-world implementation — in plain, practical terms.

    What GitOps Actually Means (Beyond the Buzzword)

    GitOps is an operational framework that applies Git-based workflows — pull requests, version control, branching, and code review — to infrastructure management. The term was coined by Weaveworks in 2017, but by 2026, it has become a standard practice across cloud-native organizations worldwide. The core idea is deceptively simple: if your infrastructure configuration lives in Git, every change is tracked, auditable, and reversible.

    Traditional infrastructure management often relied on manual CLI commands, ad hoc scripts, or configuration changes applied directly to servers. These approaches create what engineers call configuration drift — the gap between what you think your infrastructure looks like and what it actually is. GitOps closes that gap by treating your declared infrastructure state in Git as the authoritative definition of what should be running.

    The Four Core Principles of GitOps

    • Declarative configuration: The entire system is described declaratively. You specify what you want, not how to achieve it. Tools like Kubernetes manifests, Terraform files, or Helm charts are classic examples.
    • Versioned and immutable state: All desired states are stored in Git, providing a complete history of every change made to your infrastructure.
    • Automatic reconciliation: Software agents continuously compare the actual system state against the desired state stored in Git and automatically correct any differences.
    • Approved changes via Git: All changes to the system must go through Git — no direct cluster access, no manual tweaks that bypass version control.

    These principles come directly from the OpenGitOps project, which was established under the CNCF (Cloud Native Computing Foundation) to standardize the definition. Understanding these four pillars helps you evaluate whether any given tool or workflow genuinely qualifies as GitOps versus simply “using Git for deployments.”

    How Git Workflows Power Infrastructure Management

    The mechanics of GitOps rely on two main architectural patterns: the push model and the pull model. Understanding the difference matters enormously when you’re choosing tools and designing pipelines.

    Push-Based Pipelines

    In a push-based model, your CI/CD pipeline (think GitHub Actions, GitLab CI, or Jenkins) detects a change in the Git repository and actively pushes that change to the target environment. This is the more traditional CI/CD approach. When a developer merges a pull request, the pipeline triggers, builds the artifact, and deploys it directly to the cluster or server.

    Push-based systems are intuitive and widely understood. However, they require your pipeline to have direct credentials and access to your production environment — which introduces security risks and makes it harder to detect configuration drift after deployment.

    Pull-Based Pipelines (The True GitOps Approach)

    Pull-based GitOps flips the model. An agent running inside your environment continuously monitors the Git repository. When it detects a difference between the desired state in Git and the actual running state, it pulls and applies the changes automatically. Nothing outside your cluster needs direct access to it.

    Tools like Argo CD and Flux CD are the leading implementations of this pattern. Argo CD, in particular, reported over 14,000 GitHub stars and millions of production deployments as of early 2026, making it one of the most widely adopted GitOps operators in the Kubernetes ecosystem. The pull model is more secure, more auditable, and more aligned with the strict definition of GitOps.

    Git Branching Strategies for Infrastructure

    Applying GitOps at scale means thinking carefully about your branching strategy. Common approaches include:

    • Environment branches: Separate branches for dev, staging, and production. Promotions happen via pull requests between branches, giving you a clear audit trail for every environment change.
    • Trunk-based with overlays: A single main branch with environment-specific configuration overlays (often managed with Kustomize). Changes flow from main with environment customizations layered on top.
    • Tag-based releases: Infrastructure versions are pinned to specific Git tags, making it trivial to know exactly what version is running in production at any given moment.

    There’s no universal correct answer — the right strategy depends on your team size, compliance requirements, and deployment cadence. Larger organizations operating in regulated industries like finance or healthcare often prefer environment branches for their explicit approval chains, while fast-moving startups often favor trunk-based approaches for speed.

    Key Tools in the GitOps Ecosystem

    GitOps is a set of principles, not a product. But the tools you choose determine how well those principles translate into daily practice. Here’s a practical overview of the tools that dominate the ecosystem in 2026.

    Argo CD

    Argo CD is a declarative, Kubernetes-native continuous delivery tool that watches Git repositories and synchronizes your cluster state with the declared configuration. It provides a powerful web UI, multi-cluster support, and robust RBAC controls. It’s particularly strong for teams managing multiple Kubernetes clusters across different environments or cloud providers.

    Flux CD

    Flux is a CNCF graduated project that offers a lightweight, operator-based approach to GitOps. Unlike Argo CD, Flux is entirely CLI-driven and has no built-in UI, which appeals to teams who prefer Kubernetes-native tooling and minimal overhead. Flux also supports Helm releases and image automation, allowing it to automatically update image tags in Git when new container images are pushed to a registry.

    Terraform and OpenTofu for Infrastructure as Code

    While Argo CD and Flux handle Kubernetes workloads, Terraform (and its open-source fork OpenTofu) manage the underlying cloud infrastructure — VPCs, databases, load balancers, IAM roles, and more. When combined with GitOps workflows through tools like Atlantis (which runs Terraform plans and applies directly from pull request comments), you get end-to-end GitOps coverage from cloud resources down to running pods.

    Kustomize and Helm

    Both tools handle environment-specific configuration layering. Helm uses templated charts with values files, while Kustomize uses a patching approach with no templating engine. Both integrate natively with Argo CD and Flux, and choosing between them often comes down to whether your team prefers template-based or overlay-based configuration management.

    Real Benefits Teams Are Seeing — With Data to Back It Up

    GitOps isn’t just elegant in theory — it delivers measurable operational improvements. According to the 2025 State of DevOps Report published by DORA (DevOps Research and Assessment), teams practicing GitOps consistently demonstrated faster mean time to recovery (MTTR) and higher deployment frequencies compared to teams using traditional imperative deployment methods.

    Specifically, organizations using GitOps workflows reported a 60% reduction in failed deployments compared to teams relying on manual or script-based deployments. Rollbacks — which can take hours in traditional setups — become a Git revert operation that resolves in minutes. The complete audit trail in Git also satisfies compliance requirements in SOC 2, ISO 27001, and PCI DSS frameworks, reducing the burden of security reviews.

    Beyond reliability, GitOps dramatically improves developer experience. Developers work in familiar Git workflows rather than learning complex deployment consoles. Junior engineers can make infrastructure changes safely because every modification goes through peer review before being applied. This democratization of infrastructure — sometimes called platform engineering — is one of the most discussed trends in DevOps circles throughout 2025 and 2026.

    Security Advantages Worth Highlighting

    One underappreciated benefit of pull-based GitOps is its security posture. Because the agent inside the cluster initiates connections outward to Git rather than accepting inbound connections from CI pipelines, you dramatically reduce your attack surface. There’s no need to store cloud credentials in external CI systems, and access control is centralized through your Git provider’s permission model. In an era of frequent supply chain attacks, this architecture provides meaningful defense-in-depth.

    Getting Started: A Practical Path to GitOps Adoption

    The biggest mistake teams make when adopting GitOps is trying to migrate everything at once. A phased approach is far more effective and sustainable.

    Phase 1: Establish Your GitOps Repository Structure

    Start by creating a dedicated infrastructure repository (often called an “infra repo” or “gitops repo”) separate from your application code. This repository will hold all your Kubernetes manifests, Helm values, or Kustomize overlays. Define a clear folder structure from day one — typically organized by cluster, then by namespace or application. Good structure prevents the repository from becoming an unmaintainable mess as you scale.

    Phase 2: Deploy Your GitOps Operator

    Choose either Argo CD or Flux and deploy it to your cluster. Both have excellent getting-started documentation. Point the operator at your infrastructure repository and watch it synchronize your first application. This initial setup typically takes a few hours for engineers familiar with Kubernetes. The key milestone is your first successful sync — seeing a running application whose state is fully controlled by a Git commit.

    Phase 3: Enforce Git-Only Changes

    This is the hardest cultural step. Once GitOps is in place, you must stop allowing direct kubectl apply commands or manual changes to production clusters. Enforce this through RBAC controls that restrict direct cluster access for everyone except the GitOps operator. The discomfort of this transition is temporary; the benefits in clarity and reliability are permanent.

    Phase 4: Extend to Infrastructure Provisioning

    Once Kubernetes workloads are under GitOps control, integrate your cloud infrastructure using Terraform or OpenTofu with a tool like Atlantis or Spacelift. Now your entire stack — from VPCs to running containers — is managed through pull requests. This is the gold standard for GitOps maturity.

    Practical Tips for Successful Adoption

    1. Write comprehensive README files in your infra repo — future you and your colleagues will thank you.
    2. Set up Slack or Teams notifications from your GitOps operator so the team knows when syncs succeed or fail.
    3. Use sealed secrets or an external secrets manager (like HashiCorp Vault or AWS Secrets Manager) to handle sensitive values — never store plaintext secrets in Git.
    4. Define a clear process for emergency hotfixes that bypasses normal PR review, but ensure those changes are committed back to Git immediately afterward.
    5. Conduct regular “drift audits” early in adoption to catch any out-of-band changes before they become habits.

    Common Pitfalls and How to Avoid Them

    Even well-intentioned GitOps implementations go sideways. The most common failure modes are predictable and avoidable.

    Treating GitOps as just another CI/CD tool. GitOps is an operational philosophy. Teams that implement it purely as a deployment mechanism without embracing the cultural shift toward Git as the source of truth miss most of the benefits. Buy-in from the entire engineering team — not just platform engineers — is essential.

    Neglecting secrets management. Many teams hit a wall when they realize they can’t store database passwords or API keys in Git. Plan your secrets management strategy before you need it. Tools like External Secrets Operator integrate cleanly with both Argo CD and Flux and sync secrets from cloud secret stores into Kubernetes without ever committing them to Git.

    Overcomplicating the repository structure. Repository sprawl is real. Some organizations end up with hundreds of loosely related repositories, making it difficult to understand which repo controls which environment. Establish naming conventions and ownership rules early, and revisit them as you scale.

    Ignoring observability. GitOps manages your desired state, but it doesn’t replace application monitoring. Pair your GitOps setup with robust observability tooling — Prometheus, Grafana, and OpenTelemetry are popular choices in 2026 — so you can detect when the actual running behavior diverges from what the code suggests it should be doing.


    Frequently Asked Questions About GitOps

    Is GitOps only for Kubernetes?

    No, although Kubernetes is the most common use case. GitOps principles apply to any system that can be described declaratively and managed by an automated reconciliation agent. Terraform-based GitOps workflows manage cloud infrastructure resources outside Kubernetes, and tools like Ansible can be used in GitOps-style patterns for VM-based environments. That said, Kubernetes does offer the most mature tooling ecosystem for GitOps in 2026.

    How is GitOps different from traditional CI/CD?

    Traditional CI/CD focuses on automating the build, test, and deployment pipeline — getting code from a developer’s machine to production. GitOps extends this by making Git the continuous operational control plane for your running environment. The key difference is ongoing reconciliation: GitOps agents continuously ensure the running state matches Git, even after deployment. Traditional CI/CD typically hands off responsibility once the deployment job completes.

    What happens if the Git repository goes down?

    This is a legitimate concern. Most GitOps operators cache the last known desired state locally, so a brief Git outage won’t immediately destabilize your running environment. However, new deployments and changes will queue up until connectivity is restored. For mission-critical environments, organizations mitigate this risk by using highly available Git hosting (GitHub Enterprise, GitLab, or Bitbucket with enterprise SLAs) and sometimes by running a local Git mirror inside the cluster network.

    How do I handle database migrations in a GitOps workflow?

    Database migrations are one of the trickier aspects of GitOps because they’re stateful and often irreversible. Common approaches include running migrations as Kubernetes Jobs triggered by the deployment, using tools like Flyway or Liquibase as init containers, or separating migration pipelines from application deployments entirely. The key is ensuring migrations are idempotent where possible and that they’re version-controlled alongside the application code that requires them.

    Is GitOps suitable for small teams or startups?

    Absolutely — and arguably more so than large enterprises, where legacy systems create adoption friction. A startup building on Kubernetes from day one can establish GitOps practices with minimal overhead. The upfront investment in setting up Argo CD or Flux pays dividends quickly as the team grows, because every new engineer onboards to a well-understood, auditable system rather than tribal knowledge. The main caveat is ensuring someone on the team understands Kubernetes well enough to troubleshoot sync failures.

    How does GitOps support compliance and auditing requirements?

    GitOps provides a natural audit trail that compliance frameworks love. Every change to infrastructure is a Git commit with an author, timestamp, message, and reviewer. Pull request approvals create documented evidence of change authorization. Tools like Argo CD can generate compliance reports showing exactly what changed, when, and who approved it. This significantly reduces the manual documentation burden for audits under frameworks like SOC 2, ISO 27001, HIPAA, and PCI DSS.

    What skills do engineers need to work effectively with GitOps?

    The foundational skills are Git proficiency, Kubernetes familiarity, and understanding of declarative configuration tools like Helm or Kustomize. Engineers don’t need to be Kubernetes experts from day one, but comfort with reading and writing YAML manifests is essential. Knowledge of your cloud provider’s networking and IAM model becomes important as you extend GitOps to infrastructure provisioning. Soft skills matter too — specifically, the discipline to always make changes through Git rather than reaching for kubectl in a pinch.


    GitOps represents one of the most meaningful shifts in infrastructure management practice of the past decade. By anchoring your operational reality to Git, you gain reliability, security, transparency, and a dramatically smoother path through compliance audits and incident recovery. Whether you’re running a scrappy two-person startup or a regulated enterprise with hundreds of microservices, the principles of GitOps scale to meet you where you are. Start small — pick one application, deploy Argo CD or Flux, enforce Git-only changes, and feel the difference a single source of truth makes. The teams that master these workflows today are building the operational foundation that will carry them through whatever infrastructure challenges 2026 and beyond bring.

    Disclaimer: This article is for informational purposes only. Always verify technical information and consult relevant professionals for specific advice regarding your infrastructure, security, and compliance requirements.

  • How to Reduce Cloud Costs: AWS and Azure Cost Optimization Tips

    How to Reduce Cloud Costs: AWS and Azure Cost Optimization Tips

    Why Cloud Bills Keep Growing — And What You Can Do About It

    Cloud computing promised to make infrastructure cheaper, but for many businesses in 2026, monthly AWS and Azure bills have become one of the largest IT line items on the budget. According to Flexera’s 2025 State of the Cloud Report, organizations waste an average of 28% of their cloud spend — money that could be redirected toward growth, hiring, or product development. If you’re looking to reduce cloud costs without sacrificing performance or reliability, you’re in exactly the right place. This guide walks through proven, practical strategies for AWS and Azure cost optimization that work for startups, mid-market companies, and enterprises alike.

    Cloud waste doesn’t happen because teams are careless. It happens because cloud pricing models are genuinely complex, environments scale up quickly during busy periods and don’t always scale back down, and visibility into spending is often scattered across dozens of services. The good news is that the most effective cost-saving techniques aren’t technically difficult — they require awareness, process, and the right tools applied consistently.

    Understanding Where Your Cloud Money Actually Goes

    Before you can reduce cloud costs meaningfully, you need a clear picture of what you’re spending and why. This sounds obvious, but many organizations skip this step and go straight to cutting — which often leads to cutting the wrong things and causing performance problems.

    Enable Cost Visibility With Native Tooling

    Both AWS and Azure provide powerful native tools for cost analysis that are free to use and genuinely useful when set up correctly.

    • AWS Cost Explorer: Provides historical spending data, forecasting, and the ability to break costs down by service, region, linked account, or custom tags. Use it to identify which services are consuming the most budget and whether costs are trending up or down.
    • AWS Budgets: Set custom cost and usage thresholds that trigger email or SNS alerts. This prevents bill shock by catching unexpected spikes early.
    • Azure Cost Management + Billing: Microsoft’s equivalent tool provides similar visibility, including cost by subscription, resource group, service, and location. It also integrates directly with Azure Advisor for recommendations.
    • Azure Advisor: Automatically analyzes your usage patterns and recommends right-sizing, reserved instance purchases, and idle resource cleanup. It assigns a potential savings estimate to each recommendation, which is enormously useful for prioritization.

    Use Tags and Resource Groups Religiously

    Tagging is one of the most underused cost optimization tools available. When every resource is tagged with environment (production, staging, dev), team, project, and cost center, you can generate meaningful cost allocation reports. Without tags, you’re flying blind — you know the total but you can’t see which team or application is responsible for what portion of the bill. Establish a tagging policy as early as possible and enforce it through AWS Service Control Policies or Azure Policy to prevent untagged resources from being created.

    Right-Sizing: The Single Biggest Opportunity to Reduce Cloud Costs

    Right-sizing means matching the compute, memory, and storage resources you’re paying for to what your workloads actually need. This is consistently the highest-impact area for reducing cloud costs, and it’s where most organizations find their biggest savings. Gartner estimates that through 2026, more than 70% of cloud cost optimization opportunities still come from right-sizing and eliminating idle resources.

    Identify Oversized and Idle Resources

    The typical pattern is this: a developer provisions a large instance to handle anticipated traffic, the traffic never materializes at that level, and the instance runs at 10–20% CPU utilization for months. Multiply this across dozens or hundreds of instances and you have substantial waste.

    • On AWS: Use AWS Compute Optimizer, which analyzes CloudWatch metrics and recommends the optimal instance type and size for your EC2 instances, EBS volumes, Lambda functions, and ECS tasks. It can recommend downsizing instances, switching instance families, or moving to Graviton processors.
    • On Azure: Azure Advisor’s Cost tab highlights virtual machines running below 5% CPU utilization averaged over a week. These are strong candidates for downsizing or shutdown.
    • Target idle resources first: Look for EC2 instances or Azure VMs that have been stopped but still have attached EBS volumes or managed disks generating charges, elastic IP addresses not attached to running instances, and load balancers with no healthy targets.

    Switch to Graviton and Ampere Processors

    AWS Graviton3 and Graviton4 processors offer up to 40% better price-performance than equivalent x86-based instances for many workloads. For containerized applications, microservices, and web servers, the switch is often straightforward and the savings are immediate. Similarly, Azure has expanded its Ampere Altra-based virtual machines in the Dpsv5 series, offering competitive price-performance for scale-out workloads. Many teams put off this migration assuming it requires significant re-architecture — in most cases, it requires only recompiling or redeploying with a different instance type selection.

    Purchasing Models: Committed Use Discounts and Savings Plans

    On-demand pricing gives you maximum flexibility but maximum cost. For any workload with predictable, sustained usage, committing to discounted purchasing models is one of the fastest ways to reduce cloud costs — often by 30–60% compared to on-demand rates.

    AWS Savings Plans and Reserved Instances

    AWS offers two primary commitment-based discount mechanisms:

    • Savings Plans: A flexible commitment to a specific dollar amount of usage per hour (for example, $10/hour) in exchange for discounts of up to 66% on EC2, Fargate, and Lambda. Compute Savings Plans are the most flexible — they apply automatically across instance families, sizes, regions, and operating systems. SageMaker Savings Plans apply to ML workloads. Start here if you’re new to commitments because the flexibility reduces the risk of purchasing the wrong reservation.
    • Reserved Instances (RIs): Provide discounts of up to 72% for a 1-year or 3-year commitment to a specific instance type in a specific region. Standard RIs offer the deepest discounts but the least flexibility. Convertible RIs allow you to change instance family, OS, and tenancy in exchange for a slightly smaller discount.
    • Spot Instances: For fault-tolerant workloads like batch processing, data analytics, CI/CD pipelines, and development environments, Spot Instances can save up to 90% compared to on-demand pricing. They can be interrupted with a two-minute warning, so they require workloads designed for interruption.

    Azure Reserved VM Instances and Azure Hybrid Benefit

    Azure’s equivalent of reserved instances is Azure Reserved VM Instances, which offer discounts of up to 72% for 1-year or 3-year commitments. Azure also provides two additional savings mechanisms that are frequently overlooked:

    • Azure Hybrid Benefit: If your organization already has Windows Server or SQL Server licenses with Software Assurance, you can apply those licenses to Azure VMs and save up to 85% on Windows Server VMs and up to 55% on SQL Server workloads compared to standard pay-as-you-go pricing. This is often the single highest-impact saving available to enterprises migrating existing workloads.
    • Azure Spot VMs: Equivalent to AWS Spot Instances, Azure Spot VMs provide access to unused Azure capacity at up to 90% discount. Ideal for batch workloads, rendering, and development environments that tolerate eviction.
    • Azure Dev/Test pricing: If you’re running development or testing workloads, enrolling in Azure Dev/Test subscriptions through Visual Studio subscriptions unlocks significantly reduced rates on many VM types — sometimes up to 55% off production pricing.

    Storage, Networking, and Database Cost Optimization

    Compute tends to get most of the attention, but storage, data transfer, and database costs are growing rapidly as organizations accumulate data and build more interconnected systems. These areas offer substantial savings with relatively low engineering effort.

    Optimize Storage Costs

    Object storage like Amazon S3 and Azure Blob Storage are among the most cost-effective storage options available, but they become expensive when data accumulates without lifecycle policies or when the wrong storage tier is used for the access frequency of the data.

    • Use storage tiers intelligently: On S3, implement Lifecycle Policies to automatically transition objects to S3 Standard-IA after 30 days, Glacier Instant Retrieval after 90 days, and Glacier Deep Archive after 180 days (or whatever intervals match your access patterns). On Azure, use Azure Blob Storage lifecycle management to move blobs to Cool, Cold, or Archive tiers based on last modified date.
    • Enable S3 Intelligent-Tiering: For data with unpredictable or changing access patterns, S3 Intelligent-Tiering automatically moves objects between access tiers with no retrieval fees and no operational overhead. For large buckets with mixed access patterns, this often pays for itself within the first month.
    • Delete unattached EBS volumes and old snapshots: Snapshots accumulate silently over time. Use AWS Data Lifecycle Manager or custom Lambda functions to enforce snapshot retention policies and clean up snapshots for deregistered AMIs.

    Reduce Data Transfer Costs

    Data transfer costs are one of the most misunderstood aspects of cloud pricing. Data ingress is generally free; egress to the internet is not. In 2026, data transfer remains a significant cost driver for organizations with data-intensive applications.

    • Use VPC endpoints (AWS) or Azure Private Endpoints to route traffic between services privately, avoiding internet egress charges entirely.
    • Deploy CloudFront (AWS) or Azure CDN to cache content at edge locations, reducing the volume of requests hitting origin servers and cutting egress costs.
    • Review cross-region data transfer. Moving data between AWS regions or Azure regions incurs charges — architect workloads to minimize this where possible.
    • Use AWS S3 Transfer Acceleration only when you actually need accelerated uploads from distant geographic locations — it adds cost and is often enabled by default unnecessarily.

    Optimize Database and Managed Service Costs

    • Use Aurora Serverless v2 or Azure SQL Serverless for variable workloads that have unpredictable or intermittent usage. These services scale to near-zero during idle periods, eliminating the cost of running a provisioned database 24/7 for a workload that’s only active part of the time.
    • Apply Reserved Instances to RDS: RDS Reserved Instances provide up to 69% savings over on-demand pricing for production databases with predictable load. This is frequently overlooked because teams apply savings plans to compute but forget that RDS is separately priced.
    • Right-size DynamoDB and Cosmos DB: Switch DynamoDB tables to on-demand capacity mode for unpredictable workloads, and provisioned mode with auto-scaling for predictable workloads. For Azure Cosmos DB, review your provisioned Request Units against actual consumption and consider serverless mode for development and test containers.

    Building a Cost-Conscious Engineering Culture

    The technical optimizations above are only sustainable if your organization builds processes and culture around cost awareness. According to a 2025 DORA (DevOps Research and Assessment) survey, engineering teams that review cloud costs as part of their regular sprint cycle are 2.3 times more likely to maintain optimized cloud spend over time compared to teams that only review costs quarterly or in response to incidents.

    Implement FinOps Practices

    FinOps (Financial Operations) is the practice of bringing financial accountability to the variable spend model of cloud. The core principle is that everyone — engineers, product managers, and finance — shares responsibility for cloud spending decisions. Practical steps to implement FinOps include:

    • Assign cloud cost ownership to individual teams, not just a central IT or finance function.
    • Include cost metrics in sprint reviews alongside performance and reliability metrics.
    • Set team-level budgets and make spending visible in Slack or team dashboards using tools like CloudHealth, Apptio Cloudability, or Spot.io.
    • Celebrate cost reductions — recognize engineers who find and implement savings the same way you recognize feature delivery.

    Automate Cost Controls

    • Schedule non-production resources: Development and staging environments don’t need to run 24/7. Use AWS Instance Scheduler or Azure Automation runbooks to automatically stop environments outside business hours. A dev environment running 8 hours/day instead of 24 hours/day costs 67% less for that resource.
    • Set budget alerts with automated actions: AWS Budgets and Azure Cost Management both support automated actions — not just alerts — when thresholds are breached. For example, you can automatically apply a Service Control Policy that restricts new resource creation when a team exceeds their monthly budget.
    • Use Infrastructure as Code (IaC) with cost estimation: Tools like Infracost integrate with Terraform and OpenTofu pipelines to show the cost impact of infrastructure changes before they’re applied. This brings cost visibility into the pull request workflow, where it’s most actionable.

    Frequently Asked Questions

    What is the fastest way to reduce cloud costs immediately?

    The fastest wins are almost always deleting idle resources — stopped EC2 instances with attached EBS volumes, unattached Elastic IPs, old snapshots, and unused load balancers. Run an audit using AWS Trusted Advisor or Azure Advisor today and implement every “low risk” recommendation. This typically yields 5–15% savings within 48 hours with minimal engineering risk.

    How much can businesses realistically save through cloud cost optimization?

    Most organizations can reduce their cloud spend by 20–40% through a combination of right-sizing, commitment-based discounts, storage tiering, and FinOps practices. Flexera’s 2025 data shows the average realized savings after optimization initiatives is around 22%, but organizations that fully implement Savings Plans or Reserved Instances on top of right-sizing regularly achieve 35–45% reductions compared to unoptimized on-demand spending.

    Is it risky to downsize instances to save money?

    Done correctly, right-sizing carries very low risk. The key is using actual utilization data — not assumptions — to make sizing decisions. Look at CPU, memory, network, and disk I/O metrics over a 30-day period before downsizing. Start with non-production environments to validate, and use instance types in the same family where possible to minimize compatibility concerns. Always have a rollback plan ready, which in cloud environments is as simple as changing the instance type back.

    What’s the difference between AWS Savings Plans and Reserved Instances?

    Reserved Instances commit you to a specific instance type, family, and region, giving the deepest possible discounts (up to 72%). Savings Plans commit you to a dollar amount of spend per hour and apply that discount automatically across services and instance types, giving you more flexibility in exchange for a slightly smaller discount. For most modern environments — especially those using containers, Lambda, or multiple instance families — Compute Savings Plans are easier to manage and still provide excellent savings of up to 66%.

    Should I use third-party cost management tools or stick with native AWS and Azure tools?

    Native tools (AWS Cost Explorer, Azure Cost Management) are excellent starting points and should always be your foundation — they’re free, accurate, and deeply integrated with their respective platforms. Third-party tools like CloudHealth, Apptio Cloudability, and Spot.io add value primarily for multi-cloud environments, organizations that need advanced anomaly detection, or enterprises that need sophisticated chargeback and showback reporting across many teams. For most small to mid-sized organizations, native tools combined with good tagging practices are sufficient to manage costs effectively.

    How do I reduce AWS data transfer costs specifically?

    Focus on four areas: First, use VPC endpoints to keep traffic between S3, DynamoDB, and other services off the public internet entirely. Second, deploy CloudFront as a CDN to cache assets at the edge and reduce origin fetch volume. Third, architect applications to keep data processing in the same region and availability zone as the source data — cross-AZ data transfer adds up quickly for high-throughput workloads. Fourth, audit your S3 bucket configurations to ensure you’re not accidentally serving large files directly from S3 to the internet instead of through CloudFront.

    What is FinOps and do small teams need it?

    FinOps is a cultural and operational practice that aligns engineering, finance, and business stakeholders around shared responsibility for cloud spending. Small teams absolutely benefit from FinOps principles, even if they don’t need a formal FinOps team or expensive tooling. At its most basic level, FinOps for a small team means reviewing your cloud bill weekly, tagging resources consistently, setting budget alerts, and making cost a consideration in architecture decisions — not just an afterthought. These habits prevent the bill creep that catches small companies off guard as they scale.

    Reducing cloud costs is not a one-time project — it’s an ongoing discipline. Cloud environments are dynamic: new services get provisioned, traffic patterns shift, and pricing models evolve. The organizations that consistently maintain optimized cloud spend in 2026 are those that have built cost awareness into their engineering culture, automated their governance controls, and regularly revisit their commitment-based purchasing as workloads grow and change. Whether you start with a simple idle resource audit this week or implement a full FinOps program over the next quarter, every step toward intentional cloud spending directly improves your organization’s financial health and technical sustainability. The tools, techniques, and frameworks covered in this guide give you everything you need to start reducing cloud costs today and build systems that keep costs under control as you scale.

    Disclaimer: This article is for informational purposes only. Cloud pricing models, service features, and discount programs change frequently. Always verify technical information against the latest official AWS and Azure documentation, and consult qualified cloud architects or financial professionals for advice specific to your organization’s situation and requirements.

  • Multi-Cloud Strategy: Benefits, Risks and Best Practices

    Multi-Cloud Strategy: Benefits, Risks and Best Practices

    Why More Organizations Are Betting on Multiple Cloud Providers in 2026

    In 2026, relying on a single cloud vendor is increasingly seen as a strategic liability — and the shift toward a multi-cloud strategy has become one of the defining infrastructure decisions for modern enterprises. Whether you’re running a startup in Toronto, a fintech firm in London, or a retail operation in Sydney, the question is no longer if you should consider multiple cloud providers, but how to do it well. This article breaks down the real benefits, the genuine risks, and the proven best practices that separate successful multi-cloud deployments from expensive, chaotic experiments.

    According to the 2026 Flexera State of the Cloud Report, 89% of enterprises now use a multi-cloud approach, with the average organization working across 2.6 public clouds and 2.7 private clouds simultaneously. The scale of adoption is staggering — but so is the complexity. Understanding what drives this trend, and what can derail it, is essential for any technology decision-maker today.

    The Core Advantages That Are Driving Multi-Cloud Adoption

    A multi-cloud strategy means deliberately using cloud services from two or more providers — such as AWS, Microsoft Azure, and Google Cloud Platform — rather than committing everything to one vendor. The reasons organizations make this choice are practical, strategic, and increasingly competitive.

    Avoiding Vendor Lock-In

    Perhaps the most compelling reason to go multi-cloud is the freedom it preserves. When your entire infrastructure, data, and applications live inside one vendor’s ecosystem, you become dependent on their pricing models, service availability, and roadmap decisions. Switching later becomes extraordinarily expensive and disruptive. A multi-cloud approach keeps negotiating leverage in your hands and ensures that if one vendor raises prices or discontinues a service, you have viable alternatives already in operation.

    Leveraging Best-of-Breed Services

    No single cloud provider excels at everything. AWS leads in breadth of services and global infrastructure. Google Cloud Platform is widely recognized for its data analytics capabilities and machine learning tools, particularly through BigQuery and Vertex AI. Microsoft Azure dominates in enterprise identity management and hybrid cloud scenarios. A smart multi-cloud strategy lets organizations pick the best tool for each job rather than settling for a one-size-fits-all solution.

    Improved Resilience and Uptime

    Cloud providers do go down. In 2025, major outages at AWS and Azure affected thousands of businesses globally, with some disruptions lasting several hours. Distributing critical workloads across multiple providers means a regional or provider-wide failure doesn’t bring your entire operation to a halt. Multi-cloud architecture allows organizations to implement active-active or active-passive failover strategies that dramatically reduce the business impact of any single provider’s downtime.

    Geographic and Compliance Flexibility

    Data sovereignty laws in the EU, UK, Australia, and Canada require organizations to store certain data within specific geographic boundaries. Not every cloud provider has data centers in every required region. Using multiple providers gives organizations the flexibility to meet local regulatory requirements — such as GDPR in Europe, the Privacy Act in Australia, or PIPEDA in Canada — without being constrained by a single vendor’s infrastructure footprint.

    Cost Optimization Opportunities

    Cloud pricing is competitive and complex. Different providers offer different pricing models for compute, storage, networking, and specialized services. By running workloads on the platform that offers the best price-performance ratio for each use case, organizations can achieve meaningful cost savings. According to IDC research from early 2026, enterprises that actively manage a multi-cloud strategy report an average of 18% reduction in total cloud spend compared to single-vendor deployments of equivalent scale.

    The Real Risks That Leaders Tend to Underestimate

    The benefits of a multi-cloud strategy are genuine — but so are the risks. Many organizations rush into multi-cloud deployments because it sounds strategically sophisticated, without fully accounting for what they’re taking on. These risks are manageable, but only if you go in with clear eyes.

    Operational Complexity Compounds Quickly

    Managing one cloud environment is complex. Managing three is exponentially harder. Each provider has its own console, APIs, billing model, identity and access management system, monitoring tools, and support processes. Without a unified management layer, your operations team ends up switching between disconnected dashboards, losing visibility and making errors. This complexity is one of the top reasons multi-cloud strategies fail to deliver their intended value.

    Security and Governance Gaps

    Security misconfiguration is already the leading cause of cloud breaches, and multi-cloud environments dramatically increase the attack surface. Different providers implement security controls differently. Policies enforced in AWS may not translate cleanly to Azure or GCP. Organizations must maintain consistent security posture, identity governance, and data encryption standards across all environments — which requires dedicated expertise and tooling that many teams underestimate when planning their multi-cloud strategy.

    Data Egress Costs Can Spiral

    Cloud providers typically charge for data moving out of their environment — called egress fees. In a multi-cloud setup where data frequently moves between providers for processing, analytics, or replication, these costs can accumulate rapidly and undermine the cost savings that motivated the strategy in the first place. A 2025 Gartner analysis found that unexpected data transfer costs were among the top three budget overruns in enterprise cloud projects globally.

    Skills Gaps Across the Team

    Effectively operating on AWS, Azure, and GCP simultaneously requires staff who are proficient in all three ecosystems. Certifications, tooling knowledge, and architectural experience don’t transfer automatically between platforms. Many organizations find themselves stretched thin — or paying premium rates for cloud architects with genuine multi-cloud expertise. Building that capability internally takes time and deliberate investment in training.

    Latency and Integration Challenges

    Applications that span multiple cloud providers introduce network latency that can degrade performance for latency-sensitive workloads. Integrating services across providers requires careful API design, secure network connectivity, and thorough testing. Without proper architecture planning, a multi-cloud environment can deliver a worse user experience than a well-optimized single-cloud deployment.

    Building a Solid Multi-Cloud Architecture

    Successful multi-cloud deployments don’t happen by accident. They require deliberate architectural decisions made early, consistently enforced governance, and tools purpose-built for multi-cloud management.

    Define a Clear Strategy Before Deploying Anything

    Start with business outcomes, not technology preferences. Identify which workloads genuinely benefit from multi-cloud placement and why. Avoid the trap of distributing workloads across providers simply for the sake of diversity. Each deployment decision should be driven by a specific, justifiable reason — whether that’s regulatory compliance, performance optimization, cost reduction, or resilience requirements.

    Adopt a Cloud-Agnostic Architecture Where It Makes Sense

    Designing applications to be portable — using containerization with Kubernetes, for example — makes it easier to move workloads between providers when needed. Avoid hard dependencies on proprietary services that can’t easily be replicated elsewhere unless the benefit clearly outweighs the lock-in cost. Use open standards for APIs, data formats, and authentication wherever possible.

    Invest in a Unified Management and Observability Platform

    Tools like HashiCorp Terraform, Pulumi, and vendor-neutral platforms like Anthos or Azure Arc allow teams to manage infrastructure across multiple clouds from a single interface. For observability, platforms like Datadog, Dynatrace, and New Relic provide unified monitoring, logging, and alerting across all cloud environments. Without these, your team will spend more time fighting operational chaos than delivering business value.

    Establish Centralized Identity and Access Management

    Use a centralized identity provider — such as Okta or Microsoft Entra ID — to manage user access across all cloud environments consistently. Apply the principle of least privilege rigorously. Implement multi-factor authentication universally and conduct regular access reviews. This single architectural decision prevents a large proportion of the security incidents that plague poorly governed multi-cloud environments.

    Create a FinOps Practice for Multi-Cloud Cost Visibility

    Cloud cost management in a multi-cloud environment requires dedicated effort. Establish a FinOps function — even a small team or a designated individual — responsible for tagging resources consistently across providers, monitoring spend in real time, identifying waste, and optimizing reserved capacity. Tools like CloudHealth, Apptio Cloudability, and native cost dashboards from each provider should be consolidated into a single view of cloud economics across the organization.

    Practical Multi-Cloud Best Practices for 2026

    Beyond architecture, there are day-to-day operational practices that consistently separate high-performing multi-cloud organizations from those that struggle. These aren’t theoretical — they’re grounded in how real teams manage complexity at scale.

    • Automate everything possible: Manual processes don’t scale across multiple cloud environments. Infrastructure as Code, automated security scanning, and CI/CD pipelines that work across providers reduce errors and speed up delivery.
    • Standardize tagging and naming conventions: Consistent resource tagging across all providers is the foundation of cost visibility, security governance, and operational clarity. Enforce it as policy from day one.
    • Run regular disaster recovery drills: Testing your failover scenarios isn’t optional. Schedule quarterly or bi-annual exercises that simulate provider outages and verify that your failover mechanisms actually work as designed.
    • Map your data flows carefully: Know exactly where data lives, how it moves between environments, and what egress costs are generated. Use this map to make informed decisions about workload placement and data replication strategies.
    • Build a multi-cloud center of excellence: Designate a cross-functional team responsible for setting standards, evaluating new cloud services, training staff, and governing the multi-cloud environment. This team prevents fragmentation and ensures institutional knowledge is shared rather than siloed.
    • Review and renegotiate vendor contracts annually: Cloud pricing evolves rapidly. Committed use discounts, reserved instances, and enterprise agreements can significantly reduce costs — but only if you’re actively negotiating with each provider based on your actual usage patterns.

    How the Multi-Cloud Landscape Is Evolving in 2026

    The multi-cloud space is not static. Several important trends are reshaping how organizations think about and implement their multi-cloud strategy in 2026.

    AI Workloads Are Driving New Multi-Cloud Decisions

    The rapid expansion of AI and machine learning workloads is creating new reasons to go multi-cloud. Google Cloud’s TPU infrastructure and Vertex AI platform attract AI-specific workloads, while AWS Bedrock and Azure OpenAI Service offer compelling managed AI capabilities. Organizations running AI pipelines at scale are increasingly routing different stages of their AI workflows to whichever provider offers the best performance and cost profile for that specific task.

    Edge Computing Is Adding Another Layer

    As edge computing matures, organizations are extending their multi-cloud strategy beyond centralized data centers to edge locations closer to end users. AWS Outposts, Azure Stack Edge, and Google Distributed Cloud all offer hybrid edge capabilities that integrate with their respective cloud platforms — adding yet another dimension of complexity and opportunity to multi-cloud architecture planning.

    Sovereign Cloud Requirements Are Growing

    Governments and regulated industries in the UK, EU, Australia, and Canada are increasingly mandating sovereign cloud deployments — environments where data and operations remain within national or regional boundaries, managed by entities subject to local law. This is creating new multi-cloud use cases where organizations maintain a sovereign cloud deployment for regulated data alongside a commercial multi-cloud environment for other workloads.

    Interoperability Standards Are Improving

    Industry bodies and open-source communities are making meaningful progress on cloud interoperability standards. Projects like the Cloud Native Computing Foundation’s initiatives, OpenTelemetry for observability, and Kubernetes as a common orchestration layer are reducing the friction of operating across multiple clouds. This trend is gradually lowering the technical barriers that have historically made multi-cloud strategy harder to execute well.

    Frequently Asked Questions

    What is a multi-cloud strategy in simple terms?

    A multi-cloud strategy means an organization intentionally uses cloud computing services from two or more different providers — such as Amazon Web Services, Microsoft Azure, and Google Cloud — rather than relying exclusively on one. The goal is typically to improve resilience, avoid dependency on a single vendor, access the best services from each provider, and meet regulatory requirements that may vary by region.

    How is multi-cloud different from hybrid cloud?

    These terms are often confused. A hybrid cloud strategy combines a private cloud or on-premises data center with at least one public cloud provider. A multi-cloud strategy uses multiple public cloud providers. It’s possible — and common — to have both simultaneously: a hybrid, multi-cloud environment where an organization runs workloads on-premises, in a private cloud, and across two or more public clouds. The distinction matters because the management challenges and architectural considerations differ significantly between the two approaches.

    Is multi-cloud right for small businesses?

    For most small businesses, a well-managed single cloud deployment will outperform a multi-cloud approach. The operational complexity and expertise required to manage multiple cloud environments effectively typically outweigh the benefits for organizations without dedicated cloud engineering teams. Small businesses are generally better served by mastering one cloud platform before considering expansion to others. Multi-cloud makes the most sense when an organization has specific, justifiable reasons — such as regulatory compliance, a need for provider-specific AI services, or genuine resilience requirements — rather than as a default starting position.

    What are the most important tools for managing a multi-cloud environment?

    Key categories of tooling include infrastructure as code platforms such as Terraform or Pulumi for provisioning across clouds, unified monitoring platforms like Datadog or Dynatrace for observability, cloud cost management tools like CloudHealth or Apptio Cloudability for FinOps, and centralized identity providers like Okta or Microsoft Entra ID for access management. Kubernetes is widely used as a common container orchestration layer that abstracts away some of the differences between cloud environments, making application portability more manageable.

    How do you manage security across multiple cloud providers?

    Effective multi-cloud security starts with a unified security policy framework applied consistently across all providers. Use a Cloud Security Posture Management tool — such as Wiz, Orca Security, or Prisma Cloud — to continuously monitor configurations and detect vulnerabilities across all environments. Centralize identity and access management, enforce multi-factor authentication, encrypt data at rest and in transit universally, and conduct regular penetration testing and security audits across all cloud environments. Establishing clear data classification policies that dictate how different categories of data are handled across providers is also essential.

    What are typical multi-cloud egress costs and how can they be reduced?

    Egress costs vary by provider and region, but typically range from $0.08 to $0.09 per gigabyte for data leaving a major cloud provider’s network to the internet or to another cloud. These costs compound quickly when applications regularly transfer large volumes of data between providers. To reduce them, design data architectures that minimize unnecessary cross-cloud data movement, co-locate compute resources with the data they process wherever possible, use caching strategically to avoid repeated data transfers, and negotiate enterprise agreements that include discounted or waived egress fees for committed spend levels.

    How do you measure whether a multi-cloud strategy is working?

    Success in multi-cloud should be measured against the specific business outcomes that justified the strategy in the first place. Common metrics include total cloud cost relative to a pre-multi-cloud baseline, application availability and incident recovery time, compliance audit results across all environments, developer productivity and deployment frequency, and actual utilization of the best-of-breed services that motivated the multi-cloud approach. If your multi-cloud environment is more expensive, less reliable, and harder to govern than a well-managed single-cloud alternative would be, it’s a sign that the strategy needs to be re-evaluated or better executed — not necessarily abandoned.

    A well-executed multi-cloud strategy can deliver genuine competitive advantages — greater resilience, cost efficiency, regulatory flexibility, and access to the best technology each provider offers. But the keyword is executed. The organizations that benefit most from multi-cloud in 2026 are those that approach it with intentionality: clear business goals, sound architecture, unified governance, and the operational discipline to manage complexity at scale. Whether you’re evaluating your first multi-cloud move or refining an existing strategy, the principles in this guide provide a practical foundation for making decisions that serve your business well — not just now, but as the cloud landscape continues to evolve.

    Disclaimer: This article is for informational purposes only. Always verify technical information and consult relevant professionals for specific advice regarding your organization’s cloud infrastructure, security, and compliance requirements.

  • How to Monitor Cloud Infrastructure with Datadog and Grafana

    How to Monitor Cloud Infrastructure with Datadog and Grafana

    Why Cloud Monitoring Is No Longer Optional in 2026

    Cloud infrastructure failures cost businesses an average of $9,000 per minute in downtime — making robust monitoring the single most important investment in your DevOps stack today. As organizations continue migrating workloads to AWS, Azure, and Google Cloud, the complexity of managing distributed systems has exploded. Monitoring cloud infrastructure with Datadog and Grafana has emerged as one of the most powerful combinations available to engineering teams, giving you real-time visibility, intelligent alerting, and stunning dashboards that turn raw metrics into actionable intelligence. Whether you’re running a startup SaaS app or managing enterprise-scale microservices, this guide will walk you through everything you need to know to build a monitoring setup that actually works.

    According to the 2026 State of Cloud Monitoring Report by HashiCorp, 78% of engineering teams now use two or more observability tools in combination, recognizing that no single platform covers every use case perfectly. Datadog excels at deep integrations, APM, and log management. Grafana shines at flexible visualization and open-source extensibility. Together, they create a monitoring ecosystem that covers metrics, logs, traces, and alerts with minimal blind spots.

    Understanding What Each Tool Actually Does

    Before you start configuring dashboards and writing alert rules, it’s worth getting clear on what Datadog and Grafana each bring to the table — because they’re not the same thing, and they’re not really competitors either.

    Datadog: The All-in-One Observability Platform

    Datadog is a cloud-native monitoring and observability platform that collects metrics, logs, and traces from across your entire stack. In 2026, Datadog supports over 750 integrations, covering everything from Kubernetes nodes and AWS Lambda functions to PostgreSQL queries and Nginx response times. Its agent-based architecture means you deploy a lightweight agent on your infrastructure, and data flows into Datadog’s managed backend automatically.

    Key capabilities of Datadog include:

    • Infrastructure Monitoring: Live host maps, resource utilization, and process-level visibility
    • APM and Distributed Tracing: End-to-end request tracing across microservices
    • Log Management: Centralized log aggregation with pattern detection and anomaly alerting
    • Synthetic Monitoring: Simulated user interactions to catch issues before real users do
    • AI-Powered Alerting: Watchdog, Datadog’s ML engine, automatically surfaces anomalies without manual threshold tuning

    Grafana: The Visualization Powerhouse

    Grafana is an open-source analytics and visualization platform that connects to virtually any data source and renders it as beautiful, interactive dashboards. Grafana itself doesn’t collect data — it queries it. This distinction matters. You can point Grafana at Datadog, Prometheus, InfluxDB, CloudWatch, or a PostgreSQL database and build unified dashboards that pull from all of them simultaneously.

    Grafana’s key strengths include:

    • Data Source Flexibility: Connect to 150+ data sources including Datadog, Prometheus, Loki, and Elasticsearch
    • Dashboard Customization: Pixel-level control over how your data is displayed
    • Grafana Alerting: Centralized alert management that works across multiple data sources
    • Grafana Cloud: A managed hosted offering that removes the need to self-host
    • Tempo and Loki Integration: Native tracing and log aggregation within the Grafana ecosystem

    The practical result: many teams use Datadog as their primary data collection and analysis layer, then feed that data into Grafana for executive-facing dashboards, cross-team visibility, or when they need to correlate Datadog metrics alongside data from other sources like Prometheus exporters running in Kubernetes.

    Setting Up Datadog for Cloud Infrastructure Monitoring

    Getting Datadog connected to your cloud environment is straightforward, but there are configuration decisions that significantly affect what you see and how much you pay. Here’s a practical walkthrough for the most common setups.

    Installing the Datadog Agent

    The Datadog Agent is the foundation of everything. For Linux-based cloud servers, installation takes less than two minutes using the one-line install script available in your Datadog account under Integrations. Once installed, the agent automatically begins reporting system-level metrics: CPU usage, memory consumption, disk I/O, and network throughput.

    For containerized environments running on Kubernetes, deploy the Datadog Agent as a DaemonSet using the official Helm chart. This approach ensures every node in your cluster has an agent running, and the Cluster Agent component handles higher-level Kubernetes state monitoring including pod health, deployment status, and namespace-level resource consumption.

    Connecting Major Cloud Providers

    For AWS, the recommended approach is the Datadog AWS integration using an IAM role. This allows Datadog to pull CloudWatch metrics for services like EC2, RDS, ECS, Lambda, and S3 without installing agents on every service. Navigate to Integrations in Datadog, select Amazon Web Services, and follow the CloudFormation stack setup to create the necessary IAM permissions automatically. The same principle applies to Azure via Azure Active Directory app registration and Google Cloud via service account credentials.

    Configuring Monitors and Alerts

    Datadog’s monitor system is where raw metrics become operational intelligence. A well-configured alerting setup follows the RED method (Rate, Errors, Duration) for service-level monitoring and the USE method (Utilization, Saturation, Errors) for infrastructure-level monitoring. Practically speaking, start with these five monitors as your baseline:

    1. CPU utilization above 85% for 10 minutes — catches runaway processes before they cause outages
    2. Memory usage above 90% — prevents out-of-memory crashes in application containers
    3. Error rate spike detection — use anomaly detection monitors rather than fixed thresholds
    4. Service latency percentile alerts — alert on p99 latency, not just averages
    5. Host unreachable alerts — fundamental availability monitoring for every node

    Datadog’s anomaly detection monitors are particularly valuable in 2026 because they account for seasonal traffic patterns. Rather than alerting every time traffic spikes on a Monday morning, the algorithm learns your baseline and alerts only on genuine deviations. A Gartner analysis from early 2026 found that teams using ML-based anomaly detection reduced alert fatigue by up to 63% compared to static threshold alerting.

    Building Grafana Dashboards for Cloud Visibility

    With data flowing into Datadog, the next step is connecting Grafana to surface that information in ways that serve different audiences — from on-call engineers who need raw metric granularity to engineering managers who need trend summaries.

    Connecting Grafana to Datadog as a Data Source

    Grafana supports Datadog as a native data source through the Grafana plugin ecosystem. In your Grafana instance, navigate to Configuration, then Data Sources, and search for Datadog. You’ll need a Datadog API key and application key, both available in your Datadog account settings under Organization Settings. Once connected, you can query any Datadog metric, log, or trace directly within Grafana’s panel editor using Datadog’s standard query syntax.

    If you’re running Grafana Cloud — which most teams in 2026 prefer over self-hosted — the setup process is identical but you benefit from automatic updates, built-in high availability, and Grafana’s integrated alerting engine without managing your own infrastructure.

    Designing Effective Infrastructure Dashboards

    The biggest mistake teams make with Grafana is trying to show everything on one dashboard. Effective monitoring dashboards follow a hierarchy: start with a high-level overview dashboard, then link to service-specific drill-down dashboards, and finally to individual host or container dashboards. This three-tier approach means an on-call engineer can start from the top, see which service is showing red, click through to that service’s dashboard, and pinpoint the specific container or instance causing the issue — all within seconds.

    For infrastructure monitoring, your top-level Grafana dashboard should include:

    • Service health status panel — red/yellow/green status for each major service
    • Request rate and error rate time series — side by side for immediate correlation
    • Infrastructure cost trend panel — increasingly important as cloud bills scale
    • Active alerts list — pulled from Datadog’s alerting API
    • Deployment markers — vertical annotations showing when code was deployed

    Using Grafana Alerting Alongside Datadog

    When using both tools simultaneously, you’ll face a choice: manage alerts in Datadog, in Grafana, or both. The most common pattern is to keep operational alerts — the ones that page your on-call engineer at 2am — in Datadog, while using Grafana alerting for business-metric dashboards where notifications go to Slack channels rather than PagerDuty. This separation of concerns keeps your critical alert pipeline clean while still enabling Grafana to serve as an alerting layer for non-critical business monitoring.

    Advanced Monitoring Strategies for Production Environments

    Once your baseline Datadog and Grafana setup is running, the next level involves strategies that separate teams with genuinely mature observability from those just checking boxes.

    Implementing SLOs and Error Budgets

    Service Level Objectives (SLOs) are the backbone of modern reliability engineering. Datadog has a dedicated SLO feature that allows you to define targets — for example, 99.9% availability over a rolling 30-day window — and tracks your error budget in real time. When your error budget drops below 20%, Datadog can automatically trigger alerts that signal your team to slow down feature releases and focus on stability. This approach, popularized by Google’s Site Reliability Engineering methodology, gives you a quantitative framework for balancing innovation with reliability.

    Grafana can visualize SLO data pulled from Datadog, presenting error budget burn rate as a clear time-series chart that product managers and engineers can both interpret. According to a 2026 DORA (DevOps Research and Assessment) report, organizations with formal SLO tracking resolved production incidents 2.4 times faster than those without defined reliability targets.

    Distributed Tracing Across Microservices

    For teams running microservices architectures, distributed tracing is essential. Datadog’s APM automatically instruments your services — whether they’re written in Python, Node.js, Java, Go, or .NET — and generates flame graphs that show exactly where latency originates in a multi-hop request chain. When a user reports a slow checkout experience, you can trace that single request through your API gateway, authentication service, inventory service, payment processor, and database, seeing exactly which hop added the most latency.

    In Grafana, Tempo serves as an open-source distributed tracing backend. If your team wants to keep tracing data outside of Datadog for cost or data sovereignty reasons, you can send traces to Tempo while sending metrics to Datadog, then visualize everything in Grafana. This hybrid architecture is increasingly popular in 2026, particularly among teams in regulated industries in the UK, Canada, and Australia who have specific data residency requirements.

    Cost Monitoring and FinOps Integration

    Cloud cost visibility has become a core part of infrastructure monitoring in 2026. Datadog’s Cloud Cost Management feature connects to AWS Cost Explorer, Azure Cost Management, and Google Cloud Billing to overlay cost data directly onto your infrastructure dashboards. When you see a spike in Kubernetes pod count, you can immediately see the corresponding cost impact — a capability that’s driven adoption of Datadog among FinOps-focused engineering teams.

    Grafana supports this through the CloudWatch Cost and Usage Report data source for AWS, allowing you to build dedicated cost dashboards that show spending by service, team, environment, or tag. Building a cost anomaly dashboard that alerts when daily spend increases more than 20% above the 7-day average has saved many teams from discovering a six-figure cloud bill surprise at the end of the month.

    Common Pitfalls and How to Avoid Them

    Even experienced teams make mistakes when setting up cloud monitoring. Knowing the common failure modes saves you weeks of troubleshooting and thousands in wasted spend.

    Alert fatigue from noisy monitors: The most common monitoring failure isn’t missing alerts — it’s having so many low-signal alerts that engineers start ignoring them. Audit your Datadog monitors monthly. Any monitor that has fired more than 20 times in a week without resulting in a human action should be adjusted, silenced, or converted to an informational log rather than a page.

    Monitoring infrastructure but not the user experience: Infrastructure metrics can all look green while users are having a terrible experience. Always pair infrastructure monitoring with synthetic tests in Datadog that simulate real user journeys, and instrument your frontend with Real User Monitoring (RUM) to track actual page load times and JavaScript errors.

    Neglecting dashboard maintenance: Grafana dashboards become outdated as your architecture evolves. Assign dashboard ownership to specific teams and schedule quarterly dashboard reviews. A dashboard that shows a service that no longer exists erodes trust in your monitoring system as a whole.

    Underestimating data retention costs: Datadog’s pricing scales with the volume of custom metrics, log ingestion, and retention periods. Before enabling verbose logging for every service, implement log sampling strategies and use Datadog’s log pipeline processing to drop low-value log lines before they’re indexed. This single optimization commonly reduces Datadog costs by 30–50% for high-traffic applications.

    Frequently Asked Questions

    Can I use Grafana and Datadog together, or should I choose one?

    You can absolutely use both together, and many teams do. Datadog handles data collection, storage, and analysis extremely well. Grafana excels at custom visualization, multi-source dashboards, and sharing insights across teams who may not have Datadog access. The combination is particularly powerful when you want to correlate Datadog metrics alongside data from other sources like Prometheus or directly from a database. Think of Datadog as your monitoring engine and Grafana as your visualization layer.

    How much does it cost to monitor cloud infrastructure with Datadog in 2026?

    Datadog pricing in 2026 is consumption-based. Infrastructure monitoring starts at approximately $15–$23 per host per month depending on your contract. APM, log management, and synthetic monitoring are each priced separately. For a team running 50 production hosts with APM and log management enabled, a realistic monthly bill is $3,000–$8,000 depending on log volume and retention settings. Grafana Cloud’s free tier supports up to 10,000 metrics series, making it a cost-effective complement. Always request an annual enterprise contract for discounts of 20–40% off list pricing.

    What is the difference between Datadog and Prometheus for Kubernetes monitoring?

    Prometheus is an open-source metrics collection system that you self-host, while Datadog is a fully managed commercial platform. Prometheus is free but requires you to manage storage, scaling, and alerting infrastructure. Datadog handles all of that for you at a cost. For Kubernetes specifically, Prometheus with Grafana (often called the kube-prometheus-stack) is popular in cost-sensitive environments and startups. Datadog is favored by enterprises that want reduced operational overhead and richer built-in capabilities like APM and log management tightly integrated with infrastructure metrics.

    How do I set up alerting so my team doesn’t get overwhelmed with notifications?

    Effective alerting starts with defining who needs to be alerted and why. Use Datadog’s monitor priority levels and route critical alerts to PagerDuty for immediate on-call response, while lower-severity warnings go to a dedicated Slack channel. Enable Datadog’s Watchdog feature for automatic anomaly detection instead of creating dozens of manual threshold alerts. In Grafana, use notification policies to group related alerts and suppress duplicates. Review your alert firing history monthly and aggressively tune or remove any monitor that generates consistent noise without driving meaningful action.

    Can Grafana monitor AWS, Azure, and Google Cloud infrastructure without Datadog?

    Yes. Grafana can connect directly to AWS CloudWatch, Azure Monitor, and Google Cloud Monitoring as native data sources. This approach is completely valid and works well for teams that want to keep costs down by using cloud-native metrics services instead of a commercial observability platform. The trade-off is that you get less depth — CloudWatch metrics are less granular than what the Datadog Agent collects, and you lose capabilities like distributed tracing, log correlation, and ML-based anomaly detection that Datadog provides out of the box.

    What metrics should I monitor first when setting up cloud monitoring from scratch?

    Start with the four golden signals from Google’s SRE handbook: Latency (how long requests take), Traffic (request rate), Errors (error rate), and Saturation (how full your resources are). In Datadog terms, this means setting up monitors for API response time percentiles, requests per second, HTTP 5xx error rates, and CPU and memory utilization. Add host availability monitoring as a fifth immediate priority. Once these fundamentals are covered with clean, low-noise alerts, expand into deeper application performance, database query monitoring, and business metric tracking.

    Is it possible to monitor serverless functions like AWS Lambda with Datadog and Grafana?

    Yes, and this is an area where Datadog has invested heavily. The Datadog Forwarder Lambda function, deployed in your AWS account, automatically captures Lambda invocation metrics, logs, and traces and sends them to Datadog. You can track cold start rates, invocation duration, error rates, and concurrent execution counts. Grafana can then visualize this data using the Datadog data source or directly through the CloudWatch data source. For teams running significant serverless workloads — which represent a growing share of production architectures in 2026 — this visibility is essential for both performance optimization and cost control.

    Monitoring cloud infrastructure with Datadog and Grafana gives engineering teams the visibility they need to build reliable, performant systems at any scale. The key is starting with a solid foundation — deploying the Datadog Agent, configuring the right monitors using the golden signals framework, and building tiered Grafana dashboards that serve both on-call engineers and business stakeholders. From there, layering in distributed tracing, SLO tracking, and cost monitoring builds a genuinely mature observability practice. The investment pays off rapidly: teams with comprehensive cloud monitoring resolve incidents faster, ship with more confidence, and spend less time firefighting and more time building. As cloud architectures continue to evolve through 2026 and beyond, the teams that win will be the ones with the clearest view of what’s actually happening inside their systems.

    This article is for informational purposes only. Always verify technical information against official documentation for Datadog and Grafana, and consult qualified cloud engineering professionals for advice specific to your infrastructure and business requirements.

  • Serverless vs Containers: Which Architecture Should You Choose?

    Serverless vs Containers: Which Architecture Should You Choose?

    The Architecture Decision That Could Make or Break Your Next Project

    Choosing between serverless and containers is one of the most consequential infrastructure decisions a developer or engineering team will make in 2026 — and the wrong choice can cost thousands in wasted compute or months of painful refactoring. Both architectures have matured dramatically over the past few years, and the gap between them has narrowed in meaningful ways. Yet they remain fundamentally different tools suited to fundamentally different problems. This guide cuts through the marketing noise to give you a clear, practical framework for deciding which path fits your workload, your team, and your budget.

    According to the 2026 CNCF Annual Survey, container adoption now sits at 87% among organizations running cloud-native workloads, while serverless usage has climbed to 68% — with nearly 40% of respondents running both in the same production environment. The numbers tell a story: this is not an either/or war. But you still need to know which architecture leads for a given use case, because deploying the wrong one is an expensive lesson most teams would rather skip.

    Understanding What Each Architecture Actually Does

    Before comparing them side by side, it helps to be precise about what serverless and containers actually mean in practice. These terms get stretched and misused constantly, and fuzzy definitions lead to bad architectural decisions.

    Serverless: Functions, Events, and Abstracted Infrastructure

    Serverless computing — most commonly associated with AWS Lambda, Google Cloud Functions, and Azure Functions — lets you deploy individual functions or small applications without managing any underlying servers. You write code, upload it, define triggers, and the cloud provider handles everything else: provisioning, scaling, patching, and availability. You pay only for the compute time your code actually uses, measured in milliseconds.

    The “serverless” label is technically misleading. Servers absolutely exist — you just never see or touch them. What you gain is radical operational simplicity. What you give up is control. In 2026, managed serverless platforms have largely solved the infamous cold-start problem that plagued early Lambda deployments, with AWS Lambda’s SnapStart and Google’s minimum instance settings reducing cold starts to under 100ms for most runtimes.

    Containers: Portable, Consistent, and Fully Controllable

    Containers — powered by Docker images and orchestrated by Kubernetes, Amazon ECS, or Google GKE — package your application code along with its dependencies, runtime, and configuration into a single portable unit. Unlike serverless, containers give you persistent, long-running processes. You control the operating system layer, network configuration, resource limits, and scaling behavior.

    Kubernetes, now the dominant container orchestration platform, has itself become more accessible since its early complexity-heavy days. Managed Kubernetes services like EKS, GKE, and AKS have absorbed most of the operational toil. Still, running containers in production requires more infrastructure knowledge than deploying a serverless function. That is not a criticism — it is simply the nature of the additional control you are purchasing.

    Head-to-Head Comparison: Where Each Architecture Wins

    Understanding both technologies abstractly is useful. Seeing them compared across the dimensions that actually matter to engineering teams is more useful. Here is where each genuinely excels — and where each falls short.

    Cost: Serverless Wins for Spiky Workloads, Containers Win for Steady Traffic

    Serverless pricing sounds magical until you run high-volume, continuous workloads through it. At low or irregular traffic, the pay-per-invocation model is genuinely cheaper — sometimes dramatically so. A startup running a webhook processor that fires 50,000 times a month will pay a few cents on AWS Lambda. That same workload on a dedicated container cluster would require at minimum one always-on instance, adding unnecessary idle cost.

    Flip that scenario to a data pipeline processing millions of events per hour around the clock, and containers win decisively. Reserved EC2 instances running containerized workloads can be 60–80% cheaper than equivalent serverless invocations at sustained high throughput. A 2025 Datadog Cloud Cost Intelligence report found that teams migrating sustained-compute workloads from Lambda back to containers reduced their compute bills by an average of 47%.

    Scalability: Serverless Scales to Zero, Containers Scale More Predictably

    Serverless architecture scales automatically and instantly — from zero to thousands of parallel invocations within seconds. This is exceptional for unpredictable traffic bursts. An e-commerce app hit by a flash sale or a media site absorbing a viral traffic spike benefits enormously from serverless auto-scaling without any manual intervention.

    Containers scale too, but with slightly more lead time. Kubernetes Horizontal Pod Autoscaler (HPA) and KEDA (Kubernetes Event-Driven Autoscaling) have significantly tightened scaling response times, but spinning up new container instances still involves pulling images, initializing runtimes, and passing health checks. For most production systems this is perfectly acceptable. For sudden, massive, unpredictable traffic spikes of short duration, serverless retains a real advantage.

    Developer Experience and Deployment Speed

    Serverless lowers the barrier to deployment dramatically. A solo developer or small team can ship production-ready event-driven logic without writing a single line of infrastructure code. No Dockerfiles, no Kubernetes manifests, no cluster configuration. This matters enormously for startups, side projects, and internal tools where engineering bandwidth is scarce.

    Container-based development, while more complex to configure initially, offers a richer local development experience. Running your exact production environment locally via Docker Compose is a powerful debugging and testing tool. With serverless, local emulation is imperfect — AWS SAM and the Serverless Framework have improved considerably, but subtle behavioral differences between local and cloud environments remain a persistent source of bugs.

    Latency, Performance, and Long-Running Tasks

    Serverless functions have maximum execution time limits — AWS Lambda caps at 15 minutes, Google Cloud Functions at 60 minutes. This makes them unsuitable for long-running batch jobs, machine learning model training, video transcoding pipelines, or any process requiring persistent state across an extended computation window.

    Containers handle long-running tasks naturally. A containerized ML inference server, a persistent WebSocket service, or a background job processor running for hours presents no architectural challenges. For latency-sensitive applications like real-time gaming backends, financial trading systems, or live video processing, containers running on pre-warmed instances consistently outperform serverless by eliminating cold-start variability entirely.

    Security and Compliance Posture

    Serverless reduces your attack surface by abstracting the operating system entirely — you never patch a kernel or configure a firewall because you never own one. AWS, Google, and Azure handle OS-level security. Your responsibility shrinks to function-level IAM permissions and input validation. For teams with limited security resources, this is a genuine advantage.

    Containers require more security diligence: image scanning, vulnerability patching, network policy configuration, and runtime security monitoring. Tools like Trivy, Falco, and Snyk have made container security more manageable, but the responsibility surface is genuinely larger. Organizations operating under strict compliance frameworks like SOC 2, HIPAA, or FedRAMP often find containers more predictable to audit because you control and document every layer of the stack explicitly.

    Real-World Use Cases: Matching Architecture to Workload

    Abstract comparisons only go so far. The most effective way to calibrate your architectural instincts is to see how experienced engineering teams deploy each technology against specific, recognizable workloads.

    When Serverless Is the Right Call

    • API backends with variable traffic: REST or GraphQL APIs that see inconsistent load — heavy on weekdays, near-zero on weekends — are ideal serverless candidates. AWS Lambda integrated with API Gateway handles this pattern efficiently with zero idle cost.
    • Event-driven data pipelines: Triggering transformations when files land in S3, processing Kafka messages, or reacting to database change events are classic serverless patterns. Functions execute, process, terminate — no always-on infrastructure required.
    • Scheduled jobs and cron tasks: Lightweight scheduled operations like sending notification emails, generating reports, or cleaning up stale records are straightforward serverless use cases that avoid the overhead of maintaining a dedicated cron container.
    • Webhook processors: Receiving and processing inbound webhooks from third-party services like Stripe, GitHub, or Twilio — typically low-volume, bursty, and stateless — is an almost perfect serverless fit.
    • Prototyping and MVPs: When speed to market matters more than cost optimization at scale, serverless lets small teams ship quickly without infrastructure overhead.

    When Containers Are the Right Call

    • Microservices requiring persistent connections: Services maintaining WebSocket connections, gRPC streams, or database connection pools need persistent processes that serverless cannot provide cleanly.
    • Machine learning inference APIs: Serving large ML models in production requires loading model weights into memory once and keeping them warm. Container-based inference servers like those built on TorchServe or Triton Inference Server avoid the catastrophic cold-start latency of loading a multi-gigabyte model per invocation.
    • Legacy application modernization: Containerizing an existing monolith or traditional web application is far simpler than refactoring it into serverless functions. Docker provides portability and consistency without requiring architectural surgery.
    • High-throughput, low-latency workloads: Financial systems, real-time analytics engines, and gaming backends where consistent sub-10ms response times are non-negotiable need the predictability that pre-warmed containers deliver.
    • Complex multi-service applications: Applications with dozens of interdependent services, shared libraries, and complex inter-service communication patterns are more naturally expressed and debugged in a containerized microservices architecture.

    The Hybrid Architecture: Why Most Production Systems Use Both

    One of the most important insights from observing mature engineering teams in 2026 is that the serverless vs containers debate is often a false dichotomy. The most sophisticated production architectures combine both, deploying each where it genuinely fits rather than applying one technology uniformly across every problem.

    A common pattern seen at scale: containerized services handle the core application layer — persistent APIs, stateful services, ML model servers — while serverless functions handle the event-driven periphery: processing file uploads, sending transactional emails, syncing data to third-party systems, and running scheduled maintenance tasks. The containers provide the stable, low-latency backbone. The serverless functions handle the bursty, asynchronous work around the edges.

    AWS has built significant infrastructure to support this hybrid model. EventBridge connects Lambda functions to containerized ECS services seamlessly. Step Functions can orchestrate workflows that mix Lambda invocations with ECS container tasks. Google Cloud’s Workflows and Azure’s Durable Functions provide similar cross-architecture orchestration primitives.

    Platform engineering teams at larger organizations increasingly codify these hybrid patterns into internal developer platforms (IDPs), giving application developers simple abstractions that hide whether their code is ultimately running in a Lambda function or a Kubernetes pod. This approach captures the developer experience benefits of serverless while preserving the operational flexibility of containers where it matters.

    How to Make the Decision for Your Project

    If you have read this far, you likely have a specific project in mind. Here is a practical decision framework that applies the principles covered above to real architectural choices.

    Ask These Five Questions First

    1. Is your traffic pattern predictable and sustained, or variable and spiky? Sustained high throughput favors containers. Spiky or unpredictable traffic favors serverless.
    2. Does your workload require execution times longer than 15 minutes? If yes, serverless is not viable without architectural workarounds. Use containers.
    3. What is the size and expertise of your infrastructure team? Smaller teams with limited DevOps capacity should default toward serverless to reduce operational burden.
    4. Do you need consistent, predictable latency at the tail (P99/P999)? If sub-millisecond consistency matters, containers with pre-warmed instances are safer.
    5. How much does vendor lock-in concern you? Serverless functions are deeply tied to cloud provider ecosystems. Docker containers run anywhere Kubernetes runs, giving you more portability if multi-cloud or exit flexibility is a priority.

    Start With Serverless, Graduate to Containers When Needed

    For most new projects and startups, beginning with serverless and migrating specific services to containers as constraints emerge is a pragmatic and low-risk approach. This strategy avoids premature infrastructure complexity while leaving the door open to containerization once you have real production data about your actual performance and cost profile. Many successful products — including tools used by millions of developers daily — ran entirely on Lambda for their first year before selectively introducing containerized services as scale demanded it.

    The critical discipline is to keep your business logic decoupled from your infrastructure primitives from day one. Functions that avoid hard dependencies on Lambda-specific APIs can be containerized with relatively modest effort when the time comes. Architecture decisions made under pressure after a scaling crisis are almost always more expensive than incremental, planned migration.

    Frequently Asked Questions

    Is serverless always cheaper than containers?

    No — and this is one of the most common and costly misconceptions in cloud architecture. Serverless is cheaper for low-volume, intermittent, or spiky workloads because you pay only for actual compute time consumed. For sustained, high-throughput workloads running continuously, containerized applications on reserved or spot instances are typically 40–70% cheaper. Always model your expected invocation volume and duration before committing to serverless at scale.

    Can serverless functions replace microservices built on containers?

    For stateless, event-driven microservices, yes — serverless functions can replace containers effectively and with less operational overhead. For stateful services, services requiring persistent connections, or services with strict latency SLAs, containers remain the more appropriate tool. Many teams use serverless as the implementation mechanism for simple microservices and containers for complex ones, letting the workload characteristics drive the choice rather than applying one model uniformly.

    What is the cold start problem and is it still relevant in 2026?

    A cold start occurs when a serverless function is invoked after a period of inactivity, requiring the platform to initialize a new execution environment before running your code. This adds latency — historically anywhere from a few hundred milliseconds to several seconds for JVM-based runtimes. In 2026, cold starts are significantly less severe thanks to AWS Lambda SnapStart, Google Cloud’s minimum instance configuration, and improved runtime initialization across all major providers. For latency-sensitive production workloads, provisioned concurrency effectively eliminates cold starts at the cost of paying for always-warm instances — which starts to erode the serverless cost model.

    Is Kubernetes overkill for small teams?

    Self-managed Kubernetes almost certainly is overkill for teams under ten engineers. The operational complexity of running your own Kubernetes cluster — certificate rotation, etcd management, node upgrades, network plugin configuration — is substantial and rarely worth it below a certain scale. Managed Kubernetes services like GKE Autopilot, Amazon EKS with Fargate, or DigitalOcean Kubernetes abstract most of this complexity and bring containers within reach of smaller teams. Alternatively, simpler container platforms like Railway, Render, or Fly.io offer container deployments without any Kubernetes exposure at all.

    How does vendor lock-in differ between serverless and containers?

    Serverless lock-in is real and meaningful. AWS Lambda functions that use Lambda-specific event structures, IAM contexts, and integrations with services like DynamoDB Streams or SQS are not straightforwardly portable to Google Cloud Functions or Azure. Docker containers, by contrast, run on any container runtime — switch cloud providers, move to on-premises, or deploy to a hybrid environment with far less refactoring. If multi-cloud portability or the ability to migrate providers is a business requirement, containerization gives you significantly more flexibility.

    Can you use serverless for machine learning model deployment?

    For lightweight models with small memory footprints, serverless ML inference is viable — AWS Lambda supports up to 10GB of memory, which accommodates smaller models. For large language models, transformer-based models, or any inference workload requiring GPU acceleration, serverless is not appropriate. GPU-backed serverless is still nascent in 2026, limited primarily to specialized platforms. Containerized inference servers on GPU instances or managed services like AWS SageMaker, Google Vertex AI, or Azure ML remain the standard for production ML deployment at meaningful scale.

    What skills should my team develop to work effectively with both architectures?

    Engineers working in modern cloud environments benefit from understanding both paradigms at a practical level. On the serverless side: AWS Lambda or equivalent, event-driven design patterns, IAM policy design, and observability tooling like CloudWatch and X-Ray. On the container side: Docker fundamentals, Kubernetes basics (even if using a managed service), container security practices, and infrastructure-as-code with Terraform or Pulumi. Many professional cloud certifications — AWS Solutions Architect, Google Professional Cloud Architect, CKA — now cover both architectures explicitly, reflecting the industry’s hybrid reality.

    The serverless vs containers decision ultimately comes down to one principle: let your workload characteristics drive your architecture, not the other way around. Both technologies are mature, well-supported, and capable of powering world-class production systems in 2026. Serverless delivers unmatched simplicity and cost efficiency for event-driven, variable workloads. Containers deliver unmatched control, portability, and performance for sustained, complex, latency-sensitive applications. The most effective engineering teams are not ideologically committed to either — they are fluent in both, deploy them where each genuinely fits, and treat infrastructure as a tool in service of the product rather than an identity to defend.

    Disclaimer: This article is for informational purposes only. Always verify technical information against current platform documentation and consult relevant cloud architecture professionals for specific advice tailored to your organization’s requirements.

  • What Is Site Reliability Engineering (SRE) and How Does It Work?

    What Is Site Reliability Engineering (SRE) and How Does It Work?

    The Engineering Discipline Keeping the Internet Alive

    Site reliability engineering is the practice of applying software engineering principles to infrastructure and operations, ensuring large-scale systems stay fast, resilient, and available around the clock. In 2026, as digital services have become the backbone of nearly every industry, SRE has evolved from a niche Google invention into one of the most sought-after disciplines in the technology world. Whether you’re a developer curious about DevOps culture, a business leader trying to reduce downtime, or an engineer considering a career pivot, understanding SRE is no longer optional — it’s essential.

    The stakes are staggering. According to a 2025 report by the Uptime Institute, the average cost of a significant IT outage now exceeds $400,000 per hour for enterprise organizations, with complex, multi-system failures pushing costs into the millions. Meanwhile, Gartner research indicates that 70% of organizations that adopt formal SRE practices reduce their critical incident rates by more than 40% within the first 18 months. These numbers explain why companies from small SaaS startups to global financial institutions are investing heavily in site reliability engineering teams.

    The Origins and Core Philosophy of SRE

    Site reliability engineering was born inside Google around 2003, when engineer Ben Treynor Sloss was tasked with managing a production environment at a scale that traditional IT operations simply couldn’t handle. His solution was to hire software engineers and have them solve operational problems the way they’d solve any engineering challenge — with code, automation, and measurable goals. The result was a fundamentally new way of thinking about reliability.

    The philosophy rests on a simple but powerful idea: reliability is a feature, not an afterthought. Traditional operations teams often focused on keeping systems running day-to-day, frequently in reactive mode — fixing things when they broke. SRE flips that model by treating every operational problem as a software problem that can be systematically engineered away. If a task needs to be done manually more than a few times, an SRE team should automate it. If a system keeps failing under load, it should be re-architected with resilience built in from the start.

    SRE vs. DevOps: Understanding the Relationship

    Many people use SRE and DevOps interchangeably, but they’re distinct concepts with an important relationship. DevOps is a cultural and organizational philosophy that encourages collaboration between development and operations teams, breaking down silos so software can be delivered faster and more reliably. SRE, by contrast, is a specific implementation model — it’s one concrete way of achieving DevOps principles in practice.

    Think of DevOps as the philosophy and SRE as the job description. A DevOps culture might say “developers and ops should collaborate on reliability.” An SRE team operationalizes that by defining exactly how reliability is measured, who owns incident response, and what percentage of time is spent on new features versus operational work. Google’s own SRE book describes the relationship by saying: “SRE is what happens when you ask a software engineer to design an operations function.”

    The Cultural Shift SRE Demands

    Adopting site reliability engineering isn’t just a technical change — it’s a cultural one. SRE requires that development teams share ownership of reliability, not hand systems over to operations and walk away. It demands blameless post-mortems after incidents, where the goal is learning and systemic improvement rather than finding someone to blame. It also requires executive buy-in, because SRE teams will sometimes say “no” to new feature releases if doing so would compromise service reliability targets. That kind of authority requires organizational trust built from the top down.

    The Four Golden Signals and Key Reliability Metrics

    SRE teams live and die by measurement. Without clear metrics, you can’t know whether your systems are reliable or how close they are to breaking. The discipline has developed a precise vocabulary for measuring reliability, and understanding that vocabulary is crucial to understanding how site reliability engineering works in practice.

    Service Level Indicators, Objectives, and Agreements

    Three acronyms sit at the heart of SRE measurement: SLIs, SLOs, and SLAs. A Service Level Indicator (SLI) is a specific, quantitative measure of service behavior — things like request latency, error rate, or system throughput. An Service Level Objective (SLO) is the target value for that indicator — for example, “99.9% of requests should complete in under 200 milliseconds.” A Service Level Agreement (SLA) is the contractual commitment made to customers, typically more conservative than the internal SLO to provide a safety buffer.

    The distinction between SLOs and SLAs is critical. SLOs are internal engineering targets; breaching them triggers internal action. SLAs are external commitments; breaching them typically triggers financial penalties or contractual consequences. Good SRE practice sets SLOs tight enough to catch problems early but realistic enough that teams aren’t constantly firefighting.

    Error Budgets: The SRE’s Most Powerful Tool

    The error budget is arguably the most innovative concept in site reliability engineering. If your SLO says your service should be available 99.9% of the time, that means you have 0.1% of time — roughly 8.7 hours per year — where your service is allowed to be unavailable or degraded. That 0.1% is your error budget.

    Error budgets create a shared language between engineering and business. When error budgets are healthy, development teams can deploy new features aggressively. When they’re depleted — because of too many incidents or risky deployments — the team shifts focus to reliability work until the budget recovers. This mechanism elegantly balances the natural tension between shipping fast and staying stable, without requiring endless negotiation between product and engineering leadership.

    The Four Golden Signals

    Google’s SRE framework identifies four golden signals that every team should monitor for any production service. These are latency (how long requests take), traffic (how much demand the system is receiving), errors (the rate of failed requests), and saturation (how close the system is to its capacity limits). Monitoring these four signals provides a comprehensive real-time picture of system health. If any signal moves unexpectedly, it’s a leading indicator of a reliability problem — often before users even notice.

    How SRE Teams Actually Operate Day-to-Day

    Understanding the theory of site reliability engineering is one thing. Seeing how SRE teams function in real organizations is where the concepts become concrete and actionable. SRE work broadly divides into two categories: toil reduction and incident management.

    Eliminating Toil Through Automation

    Toil is SRE jargon for manual, repetitive operational work that scales linearly with system growth — things like manually restarting servers, updating configuration files by hand, or running the same deployment script dozens of times a week. Google’s SRE teams have a formal policy: no more than 50% of an engineer’s time should be spent on toil. The rest should go toward engineering work that permanently reduces toil or improves reliability.

    This isn’t just about efficiency. When engineers spend most of their time on toil, they get burned out, creative problem-solving suffers, and institutional knowledge walks out the door. The 50% cap forces organizations to invest in automation tools, internal platforms, and self-healing systems that pay dividends for years. In 2026, modern SRE teams leverage AI-assisted observability tools and automated runbooks that can resolve common incident categories without any human intervention, dramatically reducing mean time to recovery (MTTR).

    Incident Management and Blameless Post-Mortems

    When something goes wrong — and in complex systems, something always eventually goes wrong — SRE teams follow structured incident management processes. This includes clearly defined incident severity levels, on-call rotation schedules with explicit escalation paths, real-time incident command structures to prevent chaos, and formal communication templates to keep stakeholders informed without overwhelming the engineers trying to fix the problem.

    After every significant incident, SRE teams conduct a blameless post-mortem. This document captures exactly what happened, when it happened, why it happened, and — most importantly — what systemic changes will prevent it from happening again. The “blameless” aspect is not just a feel-good policy; research in organizational psychology consistently shows that blame-focused cultures suppress information sharing, which makes systems less safe over time. A 2024 study published by DORA (DevOps Research and Assessment) found that organizations with blameless post-mortem cultures resolved incidents 35% faster than those with blame-oriented practices.

    Capacity Planning and Production Readiness Reviews

    SRE teams are also deeply involved in planning for growth. Capacity planning means forecasting how much infrastructure will be needed to handle future traffic, and ensuring that resources are provisioned before demand exceeds supply — not after. Production Readiness Reviews (PRRs) are formal assessments that SRE teams conduct before new services or major features are launched, checking that observability, alerting, runbooks, and failover procedures are all in place before real user traffic arrives.

    The SRE Technology Stack in 2026

    Site reliability engineering in 2026 operates on a sophisticated toolchain that would be unrecognizable to IT operations teams of even a decade ago. While specific tool choices vary by organization, several categories of technology are universal in mature SRE practices.

    Observability Platforms

    Observability goes beyond traditional monitoring. Where monitoring tells you when something is broken, observability helps you understand why it broke, even when you’ve never seen that specific failure mode before. Modern observability stacks are built on three pillars: logs (structured records of system events), metrics (numerical measurements over time), and traces (end-to-end records of how individual requests flow through distributed systems). Platforms like Datadog, Honeycomb, Grafana, and open-source solutions built on OpenTelemetry are the standard toolkit for SRE observability in 2026.

    Infrastructure as Code and Automation

    SRE teams manage infrastructure the same way developers manage application code — through version-controlled, reviewable, automated scripts and configurations. Tools like Terraform, Pulumi, and Ansible allow teams to provision and modify entire cloud environments reproducibly. Container orchestration platforms like Kubernetes have become foundational, and in 2026, AI-assisted infrastructure optimization tools can proactively identify resource waste or scaling bottlenecks before they affect end users.

    Chaos Engineering

    One of the most counterintuitive SRE practices is deliberately breaking production systems to find weaknesses before real failures do. Chaos engineering — popularized by Netflix’s Chaos Monkey tool — involves injecting controlled failures into live systems: killing servers, introducing network latency, corrupting data streams. The goal is to validate that the system’s resilience mechanisms actually work, and to expose hidden dependencies and failure modes that only appear under stress. In 2026, chaos engineering has matured from an experimental practice into a standard component of enterprise reliability programs, with dedicated platforms automating failure injection at scale.

    Building an SRE Practice: Practical Starting Points

    For organizations looking to adopt site reliability engineering, the journey can feel overwhelming. The good news is that you don’t need to implement everything at once. A phased approach delivers value quickly while building toward a mature practice over time.

    • Start with measurement: Before changing any processes, instrument your most critical services with the four golden signals. You can’t improve what you don’t measure, and having baseline data will justify every SRE investment that follows.
    • Define your first SLOs: Pick your two or three most business-critical services and establish honest SLOs based on real user expectations. Don’t make them aspirational — make them realistic based on your current performance, then work to improve them.
    • Implement blameless post-mortems: This cultural change costs nothing and delivers immediate value. After every significant incident, run a structured blameless review and track the action items to completion.
    • Identify your top toil sources: Have your engineers track how much time they spend on manual operational work for one month. The biggest toil sources become your first automation priorities.
    • Establish on-call hygiene: Formalize your on-call rotation, set clear escalation paths, and critically, measure alert fatigue. Too many alerts means too many alerts being ignored — a dangerous situation that SRE discipline directly addresses.
    • Build incrementally: According to the 2025 State of DevOps Report, organizations that adopted SRE practices incrementally over 12 to 24 months were significantly more likely to sustain those practices long-term than those who attempted a comprehensive overhaul.

    The most important thing to remember is that SRE is not a product you buy or a certification you hang on the wall. It’s an engineering culture and a set of continuously refined practices. Organizations that treat it as a checkbox exercise consistently fail to capture its benefits.

    Frequently Asked Questions About Site Reliability Engineering

    What qualifications do I need to become an SRE?

    Most SRE roles require a strong foundation in software engineering, including proficiency in at least one systems programming language such as Python, Go, or Java. You’ll also need practical knowledge of Linux systems administration, networking fundamentals, cloud platforms like AWS, Azure, or Google Cloud, and container technologies like Docker and Kubernetes. Many successful SREs come from software development backgrounds rather than traditional IT operations, because the role demands the ability to write production-quality automation code. In 2026, familiarity with AI-assisted observability tools and infrastructure-as-code platforms has become increasingly expected even for entry-level SRE positions.

    How is SRE different from traditional system administration?

    Traditional system administrators primarily react to problems — they keep existing systems running, apply patches, and handle hardware. SRE engineers proactively engineer reliability into systems before problems occur. They write code to automate operational tasks, define measurable reliability targets, and influence how applications are architected for resilience. SREs also operate with a defined cap on operational work (typically 50% of their time), whereas traditional sysadmins often spend the vast majority of their time on ongoing operations with little room for improvement work. The career trajectory, compensation, and day-to-day work are meaningfully different.

    Do small companies need SRE, or is it just for enterprises like Google?

    SRE principles are valuable at any scale, though the formal team structure is most common in mid-to-large organizations. A startup with five engineers doesn’t need a dedicated SRE team, but it absolutely benefits from defining SLOs for its core service, running blameless post-mortems after incidents, and automating its deployment pipeline. Many small organizations start by designating one engineer as an SRE champion who introduces practices incrementally. The discipline scales down gracefully — you adopt the practices that make sense for your current size and complexity, then grow the function as your systems and team mature.

    What is the average salary for an SRE in 2026?

    Site reliability engineering remains one of the highest-compensated technical specializations in the industry. In the United States, mid-level SRE salaries range from approximately $150,000 to $220,000 annually including base, bonus, and equity components, depending on company size, location, and specialization. Senior and staff-level SREs at major technology firms frequently earn above $300,000 in total compensation. In the United Kingdom, mid-level SRE salaries typically range from £70,000 to £120,000. In Canada and Australia, comparable roles fall in the C$130,000 to C$190,000 and AUD$130,000 to AUD$180,000 ranges respectively. Demand consistently outpaces supply, keeping compensation elevated across all these markets.

    How does SRE handle the conflict between shipping features fast and maintaining reliability?

    This is precisely the problem error budgets were designed to solve. Rather than having engineering and product leadership argue about risk on a case-by-case basis, error budgets create a data-driven framework for the decision. If the service is well within its reliability targets and the error budget is healthy, teams are encouraged to ship aggressively and accept more deployment risk. If recent incidents have consumed the error budget, the SRE team has the organizational authority to slow or pause feature releases until reliability is restored. This removes the conflict from the realm of politics and opinion, grounding it in objective measurement instead.

    What is the relationship between SRE and cloud-native development?

    Cloud-native development and SRE are deeply complementary. Cloud-native architectures — built on microservices, containers, and dynamic orchestration — are inherently more complex to operate than monolithic applications, which makes SRE practices more necessary, not less. At the same time, cloud-native infrastructure provides the automation primitives that SRE teams need: auto-scaling, self-healing deployments, managed observability services, and infrastructure-as-code APIs. In 2026, most mature SRE practices are built on cloud-native foundations, and SRE principles increasingly influence how cloud-native systems are designed from the start, not just how they’re operated after deployment.

    How do AI and machine learning fit into modern SRE?

    Artificial intelligence is reshaping SRE practice in 2026 in several meaningful ways. AI-powered anomaly detection can identify unusual system behavior patterns far earlier than threshold-based alerts, reducing the time between problem onset and engineer awareness. Large language model integrations in observability platforms can synthesize incident timelines and suggest probable root causes from log data, accelerating diagnosis. Automated remediation systems can resolve common incident categories — like restarting failed services or scaling capacity — without human intervention. However, AI augments SRE practice rather than replacing it. Complex, novel failures still require experienced human engineers with deep systems knowledge to diagnose and resolve effectively.

    Site reliability engineering represents one of the most significant shifts in how the technology industry thinks about building and operating systems. By treating reliability as an engineering problem — measurable, improvable, and owned collectively by development and operations alike — SRE has moved the entire industry toward faster recovery times, more resilient architectures, and healthier engineering cultures. Whether you’re an engineer looking to specialize, a technical leader building out your organization’s capabilities, or simply someone who wants to understand why the apps and services you depend on stay online, the principles of site reliability engineering are increasingly relevant to anyone operating in the digital world.

    This article is for informational purposes only. Always verify technical information and consult relevant professionals for specific advice regarding your organization’s infrastructure, hiring decisions, or technology strategy.

  • How to Use Docker and Kubernetes Together in Production

    How to Use Docker and Kubernetes Together in Production

    Why Docker and Kubernetes Are the Power Couple of Modern Infrastructure

    Running containerized applications at scale requires more than just packaging code — it demands an orchestration strategy that keeps services fast, reliable, and recoverable under real production pressure.

    In 2026, container adoption continues its steep climb. According to the Cloud Native Computing Foundation’s annual survey, over 84% of organizations now run containerized workloads in production, with Kubernetes serving as the dominant orchestration platform across enterprise and startup environments alike. Docker remains the most widely used container runtime and image-building tool, making the combination of Docker and Kubernetes the de facto standard for deploying modern applications at scale.

    But understanding how these two technologies work together — and how to use them effectively in production — is where most teams still struggle. This guide cuts through the confusion and gives you a clear, actionable roadmap for running Docker and Kubernetes together in production environments, whether you’re managing a single microservice or a complex distributed system with dozens of components.

    Understanding the Relationship Between Docker and Kubernetes

    Before diving into production strategies, it’s worth being precise about what each tool actually does. Docker is a platform for building, packaging, and running containers. It lets you wrap your application code, dependencies, and configuration into a portable image that runs consistently across any environment. Kubernetes, on the other hand, is a container orchestration system — it doesn’t build containers, it manages them at scale.

    Think of Docker as the factory that manufactures standardized shipping containers, and Kubernetes as the port authority that decides where each container goes, how many copies run simultaneously, what happens when one fails, and how traffic gets routed between them.

    How Docker Images Feed Into Kubernetes

    The workflow starts with Docker. You write a Dockerfile that defines your application environment, then build it into an image, and push that image to a container registry — Docker Hub, Amazon ECR, Google Artifact Registry, or a private registry. Kubernetes never builds images; it pulls them from that registry and uses them to create and manage pods, which are the smallest deployable units in a Kubernetes cluster.

    This separation of concerns is intentional and powerful. Your build pipeline owns the image lifecycle. Kubernetes owns the runtime lifecycle. The two stages stay clean and independently scalable. When you update your application, you build a new Docker image, push it with a new tag, and update your Kubernetes deployment manifest to reference that tag. Kubernetes handles the rollout automatically.

    Container Runtime Context in 2026

    It’s worth noting that Kubernetes deprecated Docker as a direct runtime in version 1.24, transitioning to containerd and CRI-O as the preferred container runtimes. However, Docker images remain fully compatible — since containerd uses the same OCI image format Docker produces, your Docker-built images run on Kubernetes clusters without any modification. In practice, this change is invisible to most application teams who focus on building images rather than configuring cluster internals.

    Setting Up Your Production-Ready Environment

    Getting Docker and Kubernetes working together in production involves more than installing both tools. You need a thoughtful architecture that accounts for networking, storage, security, and observability from day one.

    Structuring Your Docker Images for Kubernetes

    Kubernetes works best with images built according to specific principles. First, images should be immutable — no runtime configuration baked in, all environment-specific values injected via environment variables or ConfigMaps. Second, images should be as small as possible. Multi-stage Docker builds are essential here: compile your code in a full build environment, then copy only the compiled binary into a minimal base image like Alpine or distroless.

    Smaller images mean faster pod scheduling because Kubernetes pulls images onto nodes before starting containers. A 50MB image that pulls in two seconds creates a much faster autoscaling response than a 1.2GB image that takes forty seconds. In latency-sensitive production environments, that difference is material.

    Tag your images with meaningful identifiers — commit SHAs or semantic version numbers — never the latest tag in production. The latest tag is mutable and creates a dangerous ambiguity about what code is actually running in your cluster. Kubernetes deployment manifests should always reference a specific, immutable tag.

    Choosing Your Kubernetes Distribution

    Managed Kubernetes services have become the standard for most production workloads in 2026. Amazon EKS, Google GKE, and Azure AKS handle control plane management, patching, and availability — reducing operational overhead significantly. GKE Autopilot in particular has gained substantial adoption for teams that want Kubernetes capabilities without deep cluster administration.

    For on-premises deployments, distributions like Rancher, OpenShift, and k3s offer production-grade options with varying levels of opinionation. The right choice depends on your compliance requirements, existing cloud relationships, and team expertise. What matters most is consistency: your Docker image build process should produce the same artifacts regardless of which Kubernetes distribution runs them.

    Core Kubernetes Concepts Every Docker User Must Know

    If you’re comfortable with Docker but new to Kubernetes, several concepts require a genuine mental shift. Understanding these deeply will save you hours of debugging in production.

    Pods, Deployments, and ReplicaSets

    A pod is a wrapper around one or more containers that share network and storage resources. In most cases, you run one container per pod — your Docker container — though sidecar patterns (adding a second container for logging or service mesh proxies) are common. You almost never create pods directly in production; instead you create a Deployment, which manages a ReplicaSet, which manages the pods. This hierarchy gives you rolling updates, rollback capabilities, and self-healing behavior automatically.

    When a node fails in your cluster, Kubernetes reschedules the affected pods onto healthy nodes. When your application crashes, Kubernetes restarts it according to the restart policy you’ve defined. This is the operational leverage that makes using Docker and Kubernetes together so powerful — Docker gives you the portable artifact, Kubernetes gives you resilience without manual intervention.

    Services and Ingress for Traffic Management

    Pods are ephemeral — they get new IP addresses every time they restart. Kubernetes Services solve this by providing a stable endpoint that routes traffic to whichever pods currently match a label selector. For external traffic, an Ingress resource (combined with an Ingress controller like NGINX or Traefik) lets you define routing rules, TLS termination, and path-based routing in a declarative configuration file.

    In production, this means your Docker containers never need to know their own IP addresses or those of their dependencies. They communicate through Service DNS names that Kubernetes resolves automatically, creating a flexible and reconfigurable network layer that survives infrastructure changes.

    ConfigMaps, Secrets, and Environment Injection

    One of the most important patterns for Docker and Kubernetes production deployments is externalizing configuration. Docker images should be environment-agnostic. Kubernetes ConfigMaps store non-sensitive configuration that gets mounted as files or injected as environment variables into your containers at runtime. Kubernetes Secrets handle sensitive values like database passwords and API keys — though for production, integrating with a dedicated secrets manager like HashiCorp Vault or AWS Secrets Manager provides better auditing and rotation capabilities.

    Production Deployment Strategies and Best Practices

    Theory is useful; production patterns are essential. Here are the deployment strategies and operational practices that separate stable production environments from fragile ones.

    Rolling Updates and Zero-Downtime Deployments

    Kubernetes rolling updates are one of the most valuable features for production teams. When you update a Deployment with a new Docker image tag, Kubernetes gradually replaces old pods with new ones, ensuring a minimum number of healthy pods remain available throughout the process. Configure maxSurge and maxUnavailable parameters to control the speed and risk of each rollout.

    Combine rolling updates with readiness probes — HTTP health checks or TCP socket checks defined in your pod spec — so Kubernetes only routes traffic to pods that have fully initialized. Without readiness probes, Kubernetes may send traffic to a pod that’s started but not yet ready to serve requests, causing errors during deployments. Liveness probes complement this by restarting containers that have entered an unrecoverable error state.

    Resource Requests and Limits

    Every container running on Kubernetes should have CPU and memory requests and limits defined. Requests tell the scheduler how much resource to reserve on a node; limits cap the maximum a container can consume. Without these, a single misbehaving container can starve neighboring pods, causing cascading failures across services that share the same node.

    A 2025 Datadog State of Cloud report found that 40% of Kubernetes-related production incidents were linked to misconfigured resource limits or pods running without any limits at all. Setting accurate resource budgets based on load testing data is one of the highest-leverage reliability improvements available to production teams.

    Horizontal Pod Autoscaling

    The Horizontal Pod Autoscaler (HPA) watches CPU utilization, memory, or custom metrics and automatically adjusts the number of pod replicas in response to load. For this to work effectively, your Docker images must be stateless — no session state stored in the container’s memory or filesystem. State should live in external databases, caches, or object storage. Stateless containers scale out instantly; stateful ones create complex coordination problems that HPA cannot solve alone.

    Namespace Strategy and Multi-Team Environments

    In organizations running multiple teams or services on shared clusters, Kubernetes namespaces provide logical isolation. Each namespace can have its own resource quotas, network policies, and RBAC rules, allowing teams to operate independently without risking interference. A common pattern is three namespaces per service: development, staging, and production — each pulling different Docker image tags from the same registry, governed by the same manifest templates with environment-specific values overridden through Helm or Kustomize.

    Observability, Security, and Ongoing Operations

    Running Docker and Kubernetes in production is not a one-time setup. Operational maturity comes from investing in observability and security as first-class concerns, not afterthoughts.

    Logging and Monitoring

    Containers write logs to stdout and stderr by design — the Docker best practice of not logging to files inside containers aligns perfectly with Kubernetes log collection. Tools like Fluentd, Fluent Bit, or the OpenTelemetry Collector aggregate logs from all pods and ship them to centralized platforms like Elasticsearch, Datadog, or Grafana Loki. Prometheus with Grafana remains the most widely adopted metrics stack for Kubernetes clusters, offering rich dashboards and alerting with deep Kubernetes integration.

    Distributed tracing via OpenTelemetry has become standard practice in 2026 for microservice architectures, giving teams end-to-end visibility into request flows across Docker containers orchestrated by Kubernetes. Without tracing, debugging latency issues in service meshes is extraordinarily difficult.

    Container Security in Kubernetes

    Security for containerized workloads involves multiple layers. At the Docker image level: scan images for vulnerabilities using tools like Trivy, Snyk, or Grype before pushing to your registry — and enforce this in your CI pipeline so vulnerable images never reach production. Use minimal base images to reduce attack surface. Never run containers as root; specify a non-root user in your Dockerfile.

    At the Kubernetes level: implement Pod Security Admission policies to enforce security constraints across namespaces. Use network policies to restrict pod-to-pod communication to only what’s required. Audit RBAC configurations regularly — overly permissive service accounts have been responsible for significant security incidents in production Kubernetes environments. According to the 2025 CNCF Security Whitepaper, misconfigurations account for the majority of Kubernetes security breaches, making policy enforcement tooling like OPA Gatekeeper or Kyverno increasingly important.

    CI/CD Pipeline Integration

    A mature Docker Kubernetes production workflow automates the entire path from code commit to deployed container. A typical pipeline looks like this: developer pushes code, CI system builds a Docker image and runs tests, a security scanner checks the image for vulnerabilities, the image is pushed to a registry with a commit SHA tag, and a CD system like ArgoCD or Flux updates the Kubernetes manifest in a Git repository, triggering a rolling deployment. This GitOps pattern, where the desired cluster state lives in Git, has become the dominant production deployment approach for teams running containerized workloads at scale.

    Frequently Asked Questions

    Do I need Docker installed on Kubernetes nodes?

    Not necessarily. Since Kubernetes version 1.24, Docker Engine is no longer required as the container runtime on nodes. Most managed Kubernetes services use containerd or CRI-O directly. However, you still use Docker on developer machines and in CI environments to build and test images, since the images Docker produces are fully compatible with these runtimes via the OCI standard.

    What is the minimum viable Kubernetes setup for a small production application?

    For a small production application, a managed Kubernetes service like EKS, GKE, or AKS with a two or three-node cluster provides a practical starting point. You’ll want at minimum: a Deployment for your application, a Service for internal routing, an Ingress with TLS for external access, a HorizontalPodAutoscaler, resource requests and limits on all containers, and basic Prometheus metrics. Many teams find that even a single microservice benefits from this setup due to the self-healing and rolling update capabilities Kubernetes provides.

    How do I handle database connections when pods scale up and down?

    Connection pooling is essential. Tools like PgBouncer for PostgreSQL or ProxySQL for MySQL sit between your application pods and the database, managing a fixed pool of connections regardless of how many pods are running. Without a connection pooler, a scaling event that launches twenty new pods can simultaneously open twenty new database connections, potentially overwhelming the database server. Store connection strings in Kubernetes Secrets and inject them as environment variables into your pods.

    How do Docker volumes work differently in Kubernetes?

    Docker volumes are node-local by default — if a container is rescheduled to a different node, it loses access to that volume. Kubernetes abstracts storage through PersistentVolumes and PersistentVolumeClaims, which can be backed by network-attached storage that follows pods across nodes. For stateful workloads like databases, StatefulSets combined with dynamic PVC provisioning from a cloud storage class provide durable, portable storage. For stateless application containers, avoid local volumes entirely and use external storage services instead.

    What is Helm and do I need it for production?

    Helm is a package manager for Kubernetes that lets you template, version, and manage sets of Kubernetes manifests as reusable charts. In production environments with multiple services or multiple deployment environments, Helm significantly reduces the complexity of managing YAML files. It allows you to define a single chart for your application and override environment-specific values like image tags, replica counts, and resource limits per environment. While not strictly required, most production teams find Helm or an equivalent tool like Kustomize essential once they move beyond two or three services.

    How do I roll back a bad deployment in Kubernetes?

    Kubernetes maintains a revision history for Deployments, making rollbacks straightforward. Using the kubectl rollout undo command reverts a Deployment to its previous revision instantly, replacing the current pods with the last known good configuration. You can also specify a specific revision number to roll back to. The key to effective rollbacks is combining this capability with good observability — you need monitoring and alerting in place to detect a bad deployment quickly, ideally within minutes of rollout, before traffic impact becomes significant.

    Is Kubernetes overkill for a small team or early-stage startup?

    It depends heavily on your operational maturity and growth trajectory. For very early stage products with a single engineer, the operational overhead of Kubernetes — even managed Kubernetes — can slow you down more than it helps. Container platforms like Railway, Render, or AWS App Runner offer Docker-based deployment without Kubernetes complexity. However, once your team grows past three or four engineers and you’re running multiple services with distinct scaling requirements, the investment in Kubernetes pays dividends through automation, reliability, and standardization. The key question is whether you have the engineering bandwidth to operate it well.

    Bringing It All Together

    Mastering how to use Docker and Kubernetes together in production is not a single skill — it’s a compounding set of practices that build on each other. You start with well-structured Docker images, move to declarative Kubernetes manifests, add health checks and resource policies, layer in observability, harden security, and automate everything through CI/CD. Each layer makes the next one more effective. Teams that invest in this foundation consistently report fewer production incidents, faster deployment cycles, and greater confidence shipping changes — which is ultimately what modern infrastructure should deliver.

    Disclaimer: This article is for informational purposes only. Always verify technical information against official documentation and consult relevant professionals or certified architects for specific production infrastructure advice tailored to your environment.

  • Cloud Security Best Practices Every Developer Should Know

    Cloud Security Best Practices Every Developer Should Know

    Why Most Cloud Breaches Are Preventable — And What You Can Do About It

    Cloud security best practices aren’t just for enterprise architects — every developer who deploys code to the cloud is responsible for the safety of that environment. According to the 2025 Verizon Data Breach Investigations Report, over 80% of cloud-related security incidents involved misconfiguration, stolen credentials, or human error — not sophisticated zero-day exploits. That’s actually good news, because it means the majority of breaches are preventable with the right habits and knowledge.

    In 2026, cloud infrastructure powers virtually everything — from solo SaaS products to multinational financial platforms. AWS, Microsoft Azure, and Google Cloud collectively host hundreds of millions of workloads, and the attack surface grows every day. The stakes are enormous: IBM’s Cost of a Data Breach Report 2025 estimates the average breach now costs organizations $4.9 million. For smaller teams and startups, a single incident can be catastrophic.

    The good news? Most of what separates a secure cloud environment from a vulnerable one isn’t expensive tooling — it’s discipline, process, and a solid understanding of the fundamentals. Whether you’re building a REST API, deploying containers, or managing multi-region infrastructure, this guide covers the cloud security best practices you need to know and actually apply.

    Identity and Access Management: The First Line of Defense

    If there’s one area where cloud security fails most predictably, it’s identity and access management (IAM). Overpermissioned roles, shared credentials, and forgotten service accounts are the digital equivalent of leaving your front door unlocked. Getting IAM right is foundational to everything else.

    Apply the Principle of Least Privilege

    Every user, service, and application should have only the permissions it needs to perform its specific function — nothing more. In practice, this means avoiding the temptation to assign administrator-level access “just in case.” Create granular IAM roles scoped to specific resources and actions. In AWS, for example, use resource-level policies rather than wildcard permissions. In Azure, use role-based access control (RBAC) with built-in roles wherever possible, and custom roles only when necessary.

    Audit your permissions regularly. Cloud providers like AWS offer tools like IAM Access Analyzer and AWS Trusted Advisor that surface unused permissions and excessive access. Set a quarterly review cadence at minimum — monthly if your team is growing quickly.

    Enforce Multi-Factor Authentication Everywhere

    MFA is non-negotiable in 2026. According to Microsoft’s internal data, accounts with MFA enabled are over 99% less likely to be compromised through credential-based attacks. Enable MFA for every human user accessing your cloud console, and consider hardware security keys (like YubiKey) for high-privilege accounts such as root or global admin roles.

    For machine-to-machine authentication, avoid long-lived static credentials entirely. Use short-lived tokens, instance profiles, workload identity federation, or managed identities instead. Never hard-code API keys or secrets in your source code — this is one of the most common causes of credential exposure, especially when code is accidentally pushed to public repositories.

    Use a Secrets Manager

    Tools like AWS Secrets Manager, Azure Key Vault, and Google Cloud Secret Manager are purpose-built to store, rotate, and audit access to sensitive credentials. Integrate these into your CI/CD pipelines and application runtime so secrets are fetched dynamically, not baked into environment variables or config files. Automate secret rotation wherever your cloud provider supports it — this dramatically reduces the blast radius of a compromised credential.

    Network Security and Architecture: Building Secure-by-Design Infrastructure

    A secure cloud environment doesn’t just depend on who has access — it depends on what can talk to what. Network architecture decisions made early in a project are difficult and expensive to undo later. Build security into your network design from the start.

    Segment Your Network With VPCs and Subnets

    Use Virtual Private Clouds (VPCs) to isolate your workloads from the public internet and from each other. Divide resources into public, private, and isolated subnets based on their exposure requirements. Your web servers might live in a public subnet, your application servers in a private subnet, and your databases in an isolated subnet with no internet route whatsoever. This segmentation limits lateral movement if an attacker does gain a foothold in one layer of your architecture.

    Use security groups and network access control lists (NACLs) to enforce traffic rules at the instance and subnet level. Default to deny-all and explicitly allow only the traffic your application needs. Avoid opening broad CIDR ranges like 0.0.0.0/0 on sensitive ports — this is one of the most common misconfigurations flagged in cloud security audits.

    Use Private Endpoints and Avoid Public Exposure

    Many cloud services — databases, storage buckets, message queues — can be accessed over the public internet by default. This is convenient, but dangerous. Use private endpoints (AWS PrivateLink, Azure Private Endpoint, GCP Private Service Connect) to route traffic for these services through your private network, never over the public internet. This eliminates an entire class of network-level attacks.

    Enable and Monitor Logs

    Enable VPC Flow Logs, cloud provider audit logs (AWS CloudTrail, Azure Activity Log, GCP Cloud Audit Logs), and service-specific logs for every environment. These are your security cameras — you can’t investigate an incident you didn’t record. Route logs to a centralized, tamper-resistant location like AWS CloudWatch Logs or a dedicated SIEM solution. Set up alerts for anomalous behavior: unusual API call volumes, access from unexpected geographies, or privilege escalation attempts.

    Data Protection: Encrypting and Securing What Matters Most

    Data is why most attackers target cloud environments in the first place. Whether it’s customer records, financial data, or proprietary code, protecting data at rest and in transit is a non-negotiable pillar of cloud security best practices.

    Encrypt Everything — At Rest and In Transit

    Modern cloud providers make encryption easy. Use server-side encryption for all storage services — S3 buckets, EBS volumes, Azure Blob Storage, Cloud Storage buckets. Choose customer-managed keys (CMKs) when you need audit control over key usage, which is increasingly required by regulations like GDPR, HIPAA, and the UK Data Protection Act 2018. Never disable encryption to improve performance without a formal risk assessment — the performance penalty of modern AES-256 encryption is negligible on current hardware.

    For data in transit, enforce TLS 1.2 or higher for all internal and external communications. Disable older protocols like TLS 1.0 and 1.1, which remain vulnerable to downgrade attacks. Use certificate management services like AWS Certificate Manager or Let’s Encrypt to automate certificate renewal and avoid expiry-related outages.

    Manage S3 Bucket and Storage Permissions Carefully

    Misconfigured storage buckets have been responsible for some of the most damaging data breaches of the past decade. In 2026, cloud providers have added more guardrails, but misconfigurations still occur. Always block public access at the account level unless you have a specific, deliberate need for public-facing static assets. Enable bucket versioning and object lock for critical data to protect against ransomware and accidental deletion. Use bucket policies and access control lists to restrict access to specific IAM principals, and audit these settings regularly using tools like AWS Config or Azure Policy.

    Data Classification and DLP

    Not all data deserves the same level of protection. Implement a data classification framework — at minimum, distinguish between public, internal, confidential, and restricted data. Apply appropriate controls to each tier. Use cloud-native Data Loss Prevention (DLP) tools such as Google Cloud DLP, Azure Purview, or AWS Macie to automatically discover and classify sensitive data across your storage systems. This is especially important for compliance with regulations that apply across the English-speaking markets this site serves — CCPA, PIPEDA, GDPR, and the Australian Privacy Act all require demonstrable data protection controls.

    Secure Development Practices: Shifting Security Left

    The most effective security is the kind that never lets a vulnerability reach production. “Shifting left” means integrating security into the development process as early as possible — not bolting it on at the end.

    Integrate Security Into Your CI/CD Pipeline

    Your continuous integration and deployment pipeline is the ideal place to catch security issues automatically. Add static application security testing (SAST) tools like Semgrep, Snyk, or Checkmarx to scan code for vulnerabilities before it’s merged. Include software composition analysis (SCA) to identify vulnerable open-source dependencies — a critical step given that supply chain attacks increased by 68% in 2024 according to Sonatype’s State of the Software Supply Chain Report.

    Run infrastructure-as-code (IaC) security scanning with tools like Checkov, tfsec, or Terraform Sentinel to catch misconfigurations before they’re deployed. If your IaC template creates an overly permissive IAM role or an unencrypted database, you want to know before it lands in production, not after.

    Container and Kubernetes Security

    Containers have transformed how applications are deployed, but they introduce their own security considerations. Scan container images for known vulnerabilities before pushing them to your registry using tools like Trivy, Grype, or Snyk Container. Use minimal base images (Alpine or distroless images) to reduce the attack surface. Run containers as non-root users and apply read-only file system policies wherever possible.

    For Kubernetes environments, apply network policies to restrict pod-to-pod communication, use Role-Based Access Control (RBAC) to limit what each workload can do within the cluster, and enable audit logging for the Kubernetes API server. Consider using a service mesh like Istio or Linkerd to enforce mTLS between services and gain granular observability into east-west traffic.

    Implement a Vulnerability Management Program

    Security is not a one-time event. Set up continuous vulnerability scanning across your cloud infrastructure with tools like Amazon Inspector, Microsoft Defender for Cloud, or Google Security Command Center. Triage findings by severity and establish SLAs for remediation — for example, critical findings within 24 hours, high findings within 7 days. Track trends over time and report on your security posture to stakeholders regularly.

    Compliance, Monitoring, and Incident Response: Being Ready When Things Go Wrong

    Even with strong preventive controls, no environment is completely immune to incidents. The organizations that fare best are the ones that detect breaches quickly and respond effectively. According to IBM’s research, organizations with an incident response plan in place save an average of $1.5 million per breach compared to those without one.

    Enable Cloud Security Posture Management

    Cloud Security Posture Management (CSPM) tools continuously audit your cloud configuration against security best practices and compliance frameworks. AWS Security Hub, Microsoft Defender for Cloud, and Google Security Command Center all provide CSPM capabilities natively. Third-party solutions like Prisma Cloud or Wiz offer multi-cloud visibility from a single pane of glass — valuable if your team operates across AWS, Azure, and GCP simultaneously. Set up automated remediation for low-risk findings and alert-based workflows for higher-risk issues.

    Build and Test an Incident Response Plan

    Document your incident response procedures before you need them. Define roles and responsibilities, communication channels, and escalation paths. Know how you would isolate a compromised instance, revoke stolen credentials, and preserve forensic evidence. Practice with tabletop exercises — simulate a ransomware attack or credential compromise and walk through your response. Many teams are surprised to discover gaps only when they run through a simulated scenario in a calm setting rather than during a real incident at 2 AM.

    Stay Compliant With Regulatory Requirements

    Depending on your industry and the markets you serve, you may be subject to SOC 2, ISO 27001, HIPAA, PCI-DSS, GDPR, or other frameworks. Cloud providers offer compliance-mapped controls and documentation to help you meet these requirements, but compliance is ultimately your responsibility. Use tools like AWS Audit Manager or Azure Compliance Manager to continuously assess your compliance posture and generate evidence for audits. Treat compliance not as a checkbox exercise but as a signal that your security controls are mature and systematic.

    Frequently Asked Questions

    What is the most common cloud security mistake developers make?

    The most common mistake is misconfiguration — leaving storage buckets publicly accessible, assigning overly broad IAM permissions, or exposing sensitive ports to the internet without restriction. These errors are often introduced unintentionally and can go undetected for months without proper monitoring and CSPM tooling in place.

    How do I securely manage API keys and secrets in a cloud environment?

    Use a dedicated secrets management service such as AWS Secrets Manager, Azure Key Vault, or Google Cloud Secret Manager. Never store secrets in source code, environment variable files committed to version control, or application configuration files. Enable automatic rotation where supported, and audit secret access logs regularly to detect unauthorized usage.

    Is cloud security the provider’s responsibility or mine?

    Both — and this distinction is critical. Cloud providers operate under a shared responsibility model. The provider secures the underlying infrastructure (physical hardware, networking, hypervisors), while you are responsible for securing what you deploy on top of it: your data, applications, access controls, operating system configurations, and network settings. Understanding exactly where the provider’s responsibility ends and yours begins is essential for any cloud environment.

    What tools should I use for cloud security monitoring?

    Start with your cloud provider’s native tools: AWS Security Hub and GuardDuty, Microsoft Defender for Cloud, or Google Security Command Center. These are well-integrated, cost-effective, and cover the majority of monitoring needs for most teams. For multi-cloud environments or more advanced threat detection, consider SIEM platforms like Splunk, Microsoft Sentinel, or Elastic Security, combined with a CSPM tool like Wiz or Prisma Cloud.

    How often should I audit my cloud security configuration?

    Ideally, security configuration checks should run continuously through automated tooling. For manual reviews, conduct a formal audit at least quarterly, and additionally after major infrastructure changes, new service adoptions, or team growth. After any security incident — however minor — run an immediate review to determine whether similar vulnerabilities exist elsewhere in your environment.

    What is Zero Trust and should developers care about it?

    Zero Trust is a security framework that assumes no user, device, or service is trustworthy by default — even inside your network. Every request must be authenticated, authorized, and continuously validated. For developers, this means designing applications that verify identity at every layer, use short-lived credentials, enforce least-privilege access, and log all access decisions. In 2026, Zero Trust principles are increasingly embedded in cloud-native architectures and are considered a benchmark for mature security posture.

    What should be included in a cloud incident response plan?

    A strong incident response plan should include clearly defined roles and responsibilities, a step-by-step playbook for common scenarios (credential compromise, data exfiltration, ransomware), communication templates for internal and external stakeholders, procedures for isolating affected resources and preserving forensic evidence, and a post-incident review process to capture lessons learned. Test the plan at least twice a year using tabletop exercises or simulated attack scenarios.

    Cloud security best practices are not a destination — they’re an ongoing discipline. The threat landscape evolves constantly, cloud services add new capabilities every month, and your own infrastructure grows in complexity over time. The developers and teams that stay secure are those who build security habits into their daily workflow, automate what can be automated, and treat every incident as a learning opportunity. Start with the fundamentals covered in this guide — IAM hygiene, network segmentation, encryption, secure development practices, and monitoring — and build from there. Your future self, your users, and your organization will thank you.

    Disclaimer: This article is for informational purposes only. Always verify technical information with your cloud provider’s official documentation and consult relevant security professionals for advice specific to your environment and compliance requirements.

  • Infrastructure as Code: Getting Started with Terraform

    Infrastructure as Code: Getting Started with Terraform

    Why Managing Cloud Infrastructure by Hand Is Costing You More Than You Think

    Infrastructure as Code with Terraform is transforming how development teams in the US, UK, Canada, Australia, and New Zealand build, manage, and scale cloud environments — cutting provisioning time by up to 70% and dramatically reducing human error. If you’ve been clicking through cloud consoles to spin up servers, configure networks, or manage databases, you already know how fragile and time-consuming that process can be. One misconfigured security group, one forgotten resource, and suddenly you’re troubleshooting an outage at 2 AM. Terraform offers a smarter, more reliable path — and this guide will show you exactly how to get started.

    In 2026, Infrastructure as Code has moved from a “nice to have” to a core competency for any engineering team working in the cloud. According to HashiCorp’s 2025 State of Cloud Strategy Survey, over 86% of organizations have adopted or are actively implementing IaC practices, with Terraform leading as the most widely used tool. The message is clear: if you’re not managing infrastructure programmatically, you’re falling behind.

    Understanding What Terraform Actually Does

    Before touching a single configuration file, it’s worth understanding what makes Terraform genuinely powerful — and different from other tools in the infrastructure space. Terraform is an open-source Infrastructure as Code tool created by HashiCorp that allows you to define your cloud resources in human-readable configuration files, then automatically provision and manage those resources across dozens of cloud providers.

    The core concept is declarative infrastructure: instead of writing step-by-step instructions for how to build something, you describe what the end state should look like, and Terraform figures out how to get there. Want three EC2 instances, a load balancer, and a VPC on AWS? Write it down in a configuration file. Terraform compares what you’ve described to what currently exists and makes only the changes needed to reach that desired state.

    The Terraform Workflow: Plan, Apply, Destroy

    Terraform operates on a simple but powerful three-stage workflow that gives teams confidence before making any real changes to live infrastructure:

    • terraform init: Initializes the working directory, downloads necessary provider plugins, and prepares the backend for state management.
    • terraform plan: Generates an execution plan showing exactly what Terraform will create, modify, or destroy — no changes happen at this stage.
    • terraform apply: Executes the plan and makes the actual changes to your infrastructure.
    • terraform destroy: Safely tears down all resources defined in your configuration — incredibly useful for temporary environments or cost management.

    This workflow is one of Terraform’s biggest advantages over manual provisioning. The plan stage acts as a safety net, letting you catch mistakes before they affect production systems.

    Terraform vs. Other IaC Tools in 2026

    You’ll often see Terraform compared to AWS CloudFormation, Pulumi, and Ansible. CloudFormation is tightly coupled to AWS and doesn’t support multi-cloud environments. Pulumi lets you write infrastructure in general-purpose programming languages like Python or TypeScript, which some developers prefer. Ansible is better suited for configuration management rather than provisioning. Terraform sits in a unique position — provider-agnostic, widely supported, and backed by a massive community. It works across AWS, Azure, Google Cloud, and over 3,000 other providers through its Registry, making it the most versatile choice for teams operating across multiple cloud environments.

    Setting Up Your First Terraform Environment

    Getting Terraform running on your machine is straightforward. The official HashiCorp binaries are available for Windows, macOS, and Linux, and installation takes under five minutes. Here’s a practical walkthrough to get your environment ready.

    Installation and Prerequisites

    Start by downloading Terraform from the official HashiCorp website or using a package manager. On macOS, Homebrew makes this simple. On Windows, Chocolatey or the official installer work well. On Ubuntu or Debian-based Linux systems, you can add HashiCorp’s official APT repository and install via the standard package manager. After installation, verify the setup by running the version check command in your terminal — you should see the installed version number returned immediately.

    You’ll also need:

    • An account with your chosen cloud provider (AWS, Azure, or GCP are the most common starting points)
    • A code editor — Visual Studio Code with the HashiCorp Terraform extension provides syntax highlighting, auto-completion, and inline documentation
    • Cloud provider CLI tools installed and authenticated (for example, the AWS CLI configured with your access credentials)
    • A basic understanding of cloud concepts like regions, virtual machines, and networking is helpful but not strictly required

    Writing Your First Configuration File

    Terraform configurations are written in HashiCorp Configuration Language (HCL), which was designed specifically to be readable by both humans and machines. Files use the .tf extension and can be organized across multiple files within a directory — Terraform automatically reads all .tf files in the working directory when you run a command.

    A minimal configuration to deploy a single cloud resource typically includes three main blocks: a terraform block specifying which provider to use and its required version, a provider block containing authentication and region settings, and a resource block defining the actual infrastructure component you want to create. Each resource block includes the resource type (like an AWS EC2 instance or Azure virtual machine) and a local name you use to reference it elsewhere in your configuration.

    For teams just starting out, provisioning a simple object storage bucket or a basic virtual network is an excellent first project. These resources are low-risk, easy to understand, and give you hands-on experience with the full Terraform workflow without the complexity of multi-tier applications.

    Core Concepts That Make Terraform Powerful

    Once you’re past the basics, understanding a handful of deeper concepts will transform the way you think about infrastructure management. These aren’t advanced topics reserved for experts — they’re fundamental ideas that every Terraform practitioner should internalize early.

    State Management: The Heart of Terraform

    Terraform maintains a state file that maps your configuration to the real-world resources it manages. This state file is how Terraform knows what already exists, what needs to be created, and what should be deleted. By default, this file is stored locally in your working directory, but for any team environment, you should configure remote state storage — typically in an S3 bucket with DynamoDB locking for AWS users, or Azure Blob Storage for Azure environments.

    Remote state brings two critical benefits: it allows multiple team members to work with the same infrastructure without conflicts, and it prevents the catastrophic scenario where a locally stored state file is lost or corrupted. In 2026, organizations that skip proper state management consistently report it as the root cause of their most painful Terraform incidents. Don’t learn that lesson the hard way.

    Variables and Outputs: Making Configurations Reusable

    Hard-coding values like instance sizes, region names, or CIDR blocks directly into resource definitions creates configurations that are brittle and difficult to reuse. Terraform’s variable system solves this elegantly. Input variables allow you to parameterize your configurations, accepting different values at runtime or through separate variable definition files. This means the same Terraform code can deploy a development environment with smaller, cheaper resources and a production environment with larger, more redundant infrastructure — with no changes to the core configuration.

    Output values work in the opposite direction, exposing information about your created resources — like an IP address or a resource ID — so other configurations or team members can reference them. Outputs are also invaluable during debugging, surfacing the information you actually care about after an apply completes.

    Modules: The Building Blocks of Scalable Infrastructure

    Modules are reusable packages of Terraform configuration that represent a logical component of your infrastructure — a VPC, a Kubernetes cluster, a database setup. Instead of rewriting the same networking configuration for every project, you write it once as a module and call it with different input variables wherever you need it.

    The Terraform Registry hosts thousands of community and verified modules covering virtually every common infrastructure pattern. HashiCorp reports that module usage has grown by over 40% year-over-year since 2023, reflecting how central reusability has become to professional IaC workflows. For teams managing multiple projects or environments, adopting a module-first approach early pays significant dividends in consistency and maintainability.

    Best Practices for Production-Ready Terraform

    Learning the syntax is the easy part. Using Terraform effectively in real-world, team-based environments requires discipline around a few key practices that separate reliable infrastructure code from configurations that cause sleepless nights.

    Version Control Everything

    Your Terraform configurations should live in a version-controlled repository from day one. Treating infrastructure code with the same rigor as application code — pull requests, code reviews, branch protections — catches errors before they reach production and creates an auditable history of every change made to your environment. According to the 2025 DORA State of DevOps Report, teams that apply software engineering practices to infrastructure consistently achieve higher deployment frequency and lower change failure rates.

    Use Workspaces for Environment Separation

    Terraform workspaces allow you to maintain multiple state files from the same configuration, making it straightforward to manage separate development, staging, and production environments. While some teams prefer separate directories or repositories per environment for stricter isolation, workspaces offer a lightweight alternative for smaller setups. The key principle is that production infrastructure should never share state with lower environments — the blast radius of an accidental destroy command is simply too high.

    Implement Policy as Code with Sentinel or OPA

    As your infrastructure scales, manual review of every terraform plan output becomes impractical. Policy as code tools like HashiCorp Sentinel (integrated with Terraform Cloud and Enterprise) or Open Policy Agent allow you to define rules that are automatically enforced before any infrastructure change is applied. Rules might prohibit unencrypted storage buckets, require specific resource tagging for cost allocation, or prevent deployment of resources in non-approved regions. Automating compliance at the infrastructure level is increasingly a regulatory requirement for organizations in finance, healthcare, and government sectors across the UK, US, and Australia.

    Lock Provider Versions

    Cloud providers update their Terraform providers frequently, and breaking changes do happen. Always specify version constraints for the providers your configuration depends on, and commit the lock file that Terraform generates to your repository. This ensures everyone on your team and every CI/CD pipeline run uses identical provider versions, eliminating a whole category of hard-to-diagnose inconsistency bugs.

    Integrating Terraform into Your CI/CD Pipeline

    Running Terraform manually from a developer’s laptop works fine for learning, but production infrastructure deserves automation. Integrating Infrastructure as Code into a continuous integration and continuous delivery pipeline brings consistency, auditability, and speed that manual workflows simply cannot match.

    The standard pattern looks like this: a developer submits a pull request with infrastructure changes, the CI system automatically runs terraform plan and posts the output as a comment on the pull request for review, and upon merge to the main branch, terraform apply runs automatically to deploy the change. Tools like GitHub Actions, GitLab CI, CircleCI, and Jenkins all support this workflow with minimal configuration.

    Terraform Cloud and the recently updated HCP Terraform (HashiCorp Cloud Platform) take this further with built-in remote execution, state management, team access controls, and a polished UI for viewing run history — making them particularly attractive for teams that want a managed solution without building their own pipeline infrastructure. As of early 2026, HCP Terraform’s free tier covers up to 500 managed resources, which is more than enough for most small to mid-sized teams getting started.

    The security aspect of CI/CD integration deserves careful attention. Cloud provider credentials should never be stored in your repository or passed as plain-text environment variables. Use your CI platform’s secrets management system, or better yet, leverage short-lived credentials via OIDC (OpenID Connect) federation — AWS, Azure, and GCP all support this approach, and it eliminates the risk of long-lived credential exposure entirely.


    Frequently Asked Questions

    Is Terraform free to use?

    The core Terraform CLI is open-source and completely free. HashiCorp licenses it under the Business Source License (BSL) as of 2023, which allows free use for non-competitive purposes. HCP Terraform (formerly Terraform Cloud) offers a free tier supporting up to 500 managed resources and a small number of users, which covers most individual and small team use cases. Paid tiers add features like single sign-on, audit logging, and priority support. For the vast majority of developers and teams learning or building with Infrastructure as Code, there are no upfront costs.

    Do I need to know programming to use Terraform?

    Not in the traditional sense. HashiCorp Configuration Language (HCL) is a domain-specific language designed to be readable and approachable without a software development background. If you understand basic concepts like variables, functions, and conditional logic, you’ll find HCL intuitive. That said, familiarity with the command line, version control (Git), and your target cloud provider’s concepts will significantly accelerate your learning. Most professionals pick up enough Terraform to be productive within two to three weeks of focused practice.

    What’s the difference between Terraform and Ansible?

    These tools solve related but distinct problems. Terraform is primarily a provisioning tool — it creates, modifies, and destroys infrastructure resources like virtual machines, networks, and storage. Ansible is primarily a configuration management tool — it installs software, manages configuration files, and handles application deployments on existing servers. Many teams use both together: Terraform to provision the underlying infrastructure, Ansible to configure what runs on it. In containerized and Kubernetes-centric environments, the line blurs further, but understanding this distinction helps you choose the right tool for each task.

    How does Terraform handle infrastructure drift?

    Infrastructure drift occurs when your actual cloud resources diverge from what’s defined in your Terraform configuration — usually because someone made a manual change through the console. Terraform detects drift during the plan stage by comparing the current real-world state against both your configuration and the stored state file. Running terraform plan regularly (or on a schedule in your CI pipeline) surfaces drift before it causes problems. The terraform refresh command updates the state file to reflect current reality, and from there you can decide whether to bring the configuration in line with the manual changes or revert the drift by applying your original configuration.

    Is Terraform suitable for small teams or solo developers?

    Absolutely. While Terraform’s benefits scale significantly with team size and infrastructure complexity, even solo developers gain meaningful advantages: reproducible environments, easy teardown of resources when not in use (great for controlling cloud costs), and the ability to recreate an entire environment from scratch in minutes. For small teams, the investment in learning Terraform pays off quickly — onboarding a new team member becomes a matter of cloning a repository rather than documenting a lengthy series of manual console steps.

    What cloud providers does Terraform support?

    Terraform’s provider ecosystem is one of its greatest strengths. As of 2026, the Terraform Registry hosts providers for over 3,000 services, including all major cloud platforms (AWS, Microsoft Azure, Google Cloud Platform, Oracle Cloud, IBM Cloud), SaaS products (Datadog, PagerDuty, Cloudflare, GitHub), databases, networking equipment, and Kubernetes. This breadth means you can manage your entire technology stack — not just your cloud infrastructure — through a single, consistent toolset. Multi-cloud and hybrid cloud architectures are particularly well served by Terraform’s provider-agnostic design.

    How should I manage sensitive values like passwords in Terraform?

    Never hardcode secrets directly in your .tf files or commit them to version control. The recommended approaches include using environment variables (Terraform reads variables prefixed with TF_VAR_ automatically), integrating with secrets management systems like HashiCorp Vault, AWS Secrets Manager, or Azure Key Vault, or using encrypted variable files that are excluded from your repository via .gitignore. Mark sensitive output values with the sensitive flag in your configuration to prevent them from being displayed in plan and apply output. In CI/CD pipelines, always inject secrets through your platform’s secure secrets storage rather than as plain-text environment variables.


    Infrastructure as Code with Terraform represents one of the highest-leverage skills a cloud professional can develop in 2026. The initial learning curve is real but shallow — most practitioners reach a productive level within weeks, and the payoff in reduced errors, faster deployments, and more resilient infrastructure compounds over time. Start with a simple project, embrace version control from the very beginning, and invest in understanding state management before tackling complex multi-environment architectures. The cloud infrastructure landscape moves fast, but teams that manage their infrastructure as thoughtfully as their application code consistently outperform those that don’t. The best time to start was yesterday — the second best time is right now.

    Disclaimer: This article is for informational purposes only. Always verify technical information against current official documentation and consult relevant professionals or certified cloud architects for specific advice regarding your infrastructure requirements.